Get a Connector For Cloud Tenant
The document provides a detailed guide on how to On-board a connector for a IDHub Cloud tenant.
Pre-Requisites
- Ensure that you have an active IDHub subscription before getting a connector for your cloud tenant. Click here to get your 30 days free trial of your IDHub Cloud subscription.
- Go to the sath website and at the top navigation menu under
Productgo toIdentity Connectorsand then click on the connector that you want to deploy. - Then you will be taken to the Cloud connector details page. Click on the button
Deploy in the cloud.
Pick a Connector
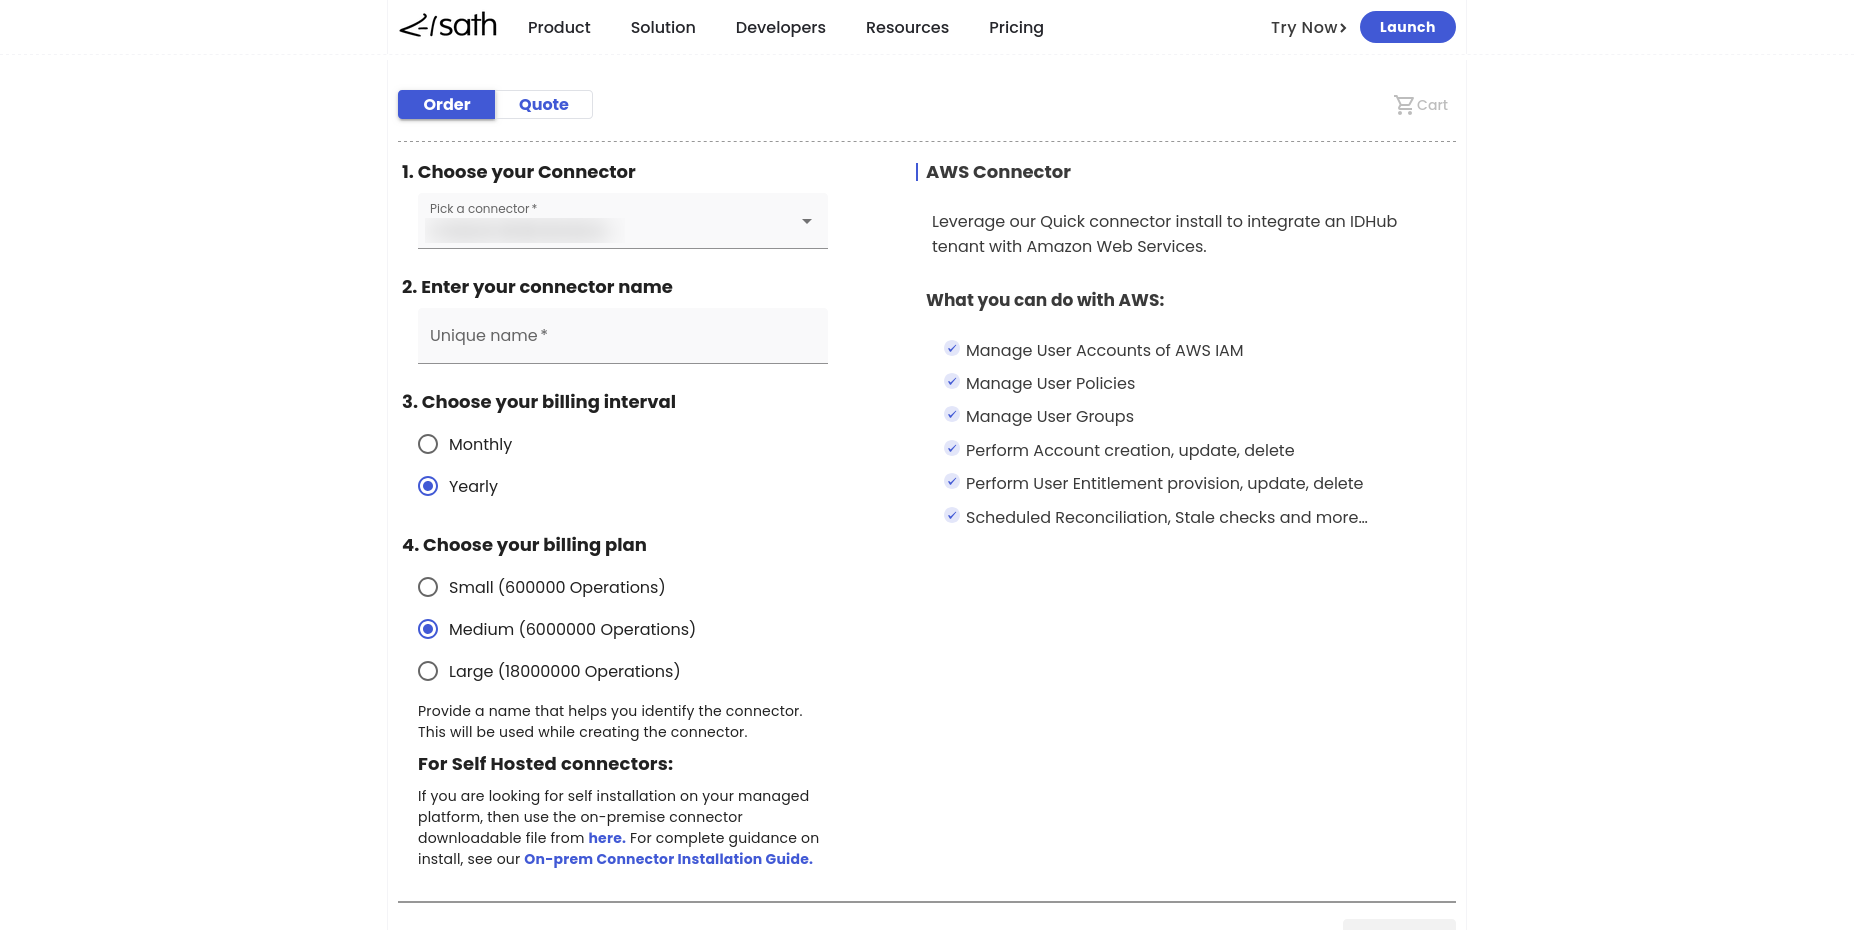
- Select the connector from
Choose your Connectordrop-down. - Enter the name of the connector. This connector name will help you identify the connector.
- Choose your Billing Interval:
- Monthly.
- Yearly.
- Choose your Billing Plan:
- Small.
- Medium.
- Large.
- Click on the
Add to Cartbutton to proceed further.
Checkout
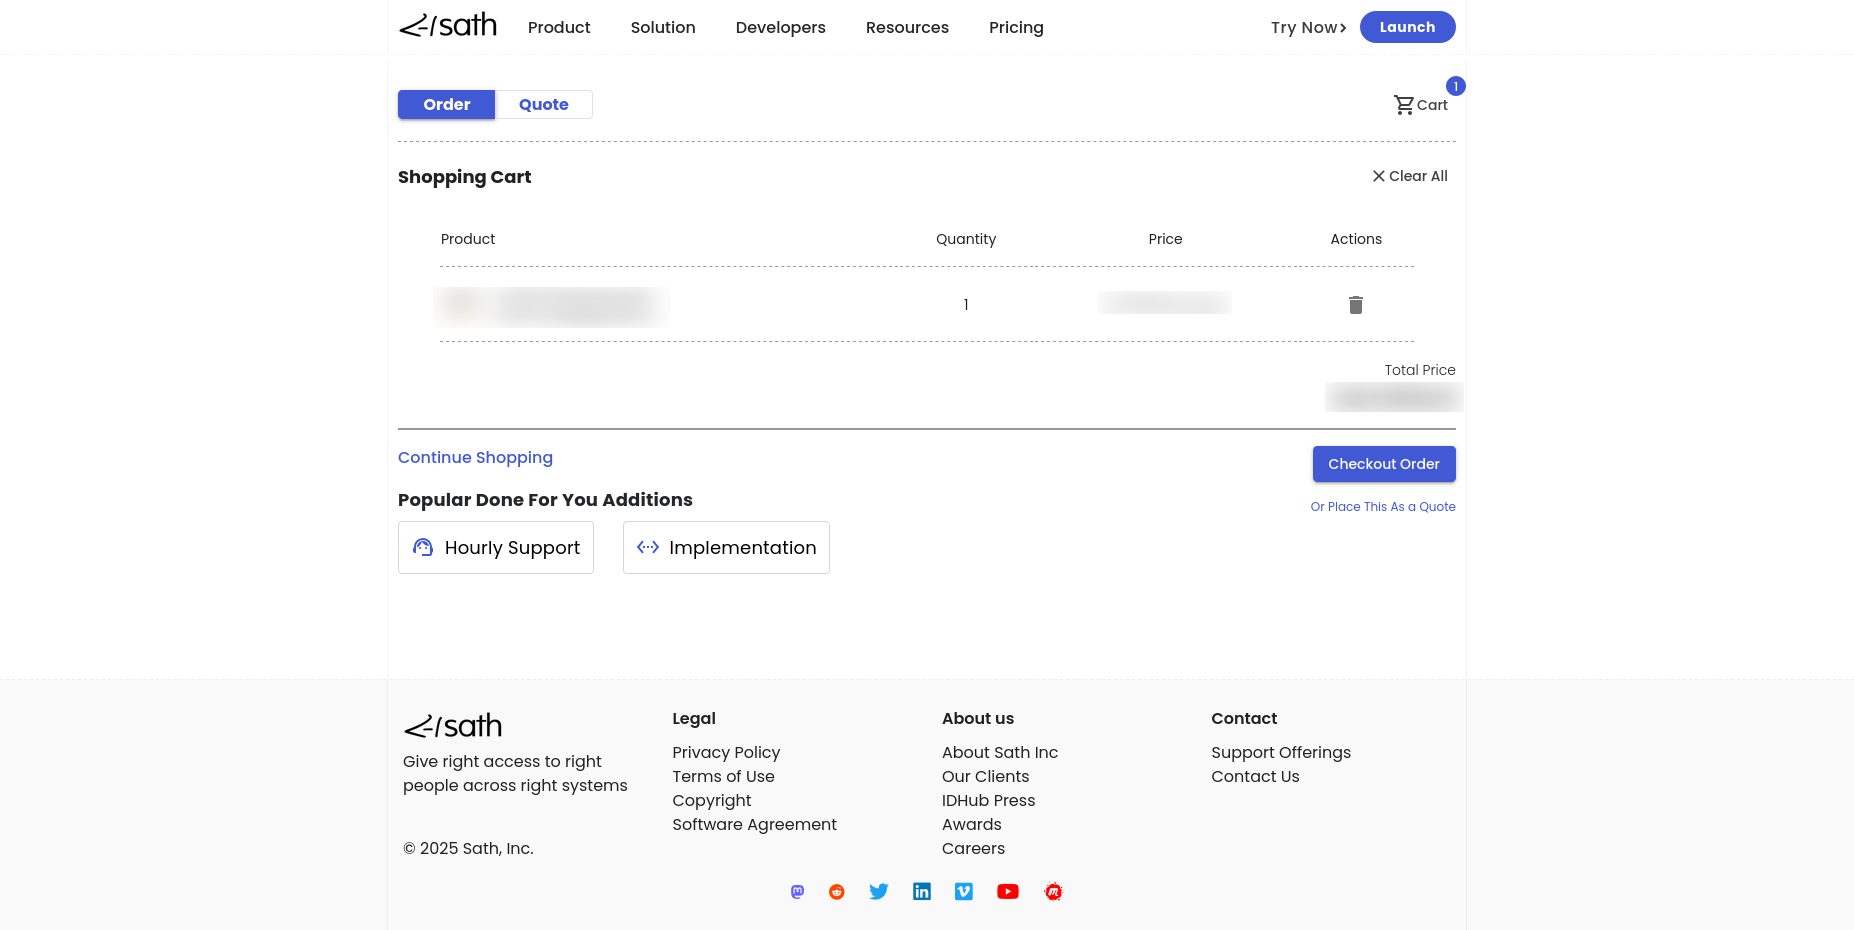
- This is the checkout page which shows the product or service that you have added to the cart, the pricing and other information.
- Click on the
Checkout Orderbutton, to proceed to the next page.
Contact and Billing Details
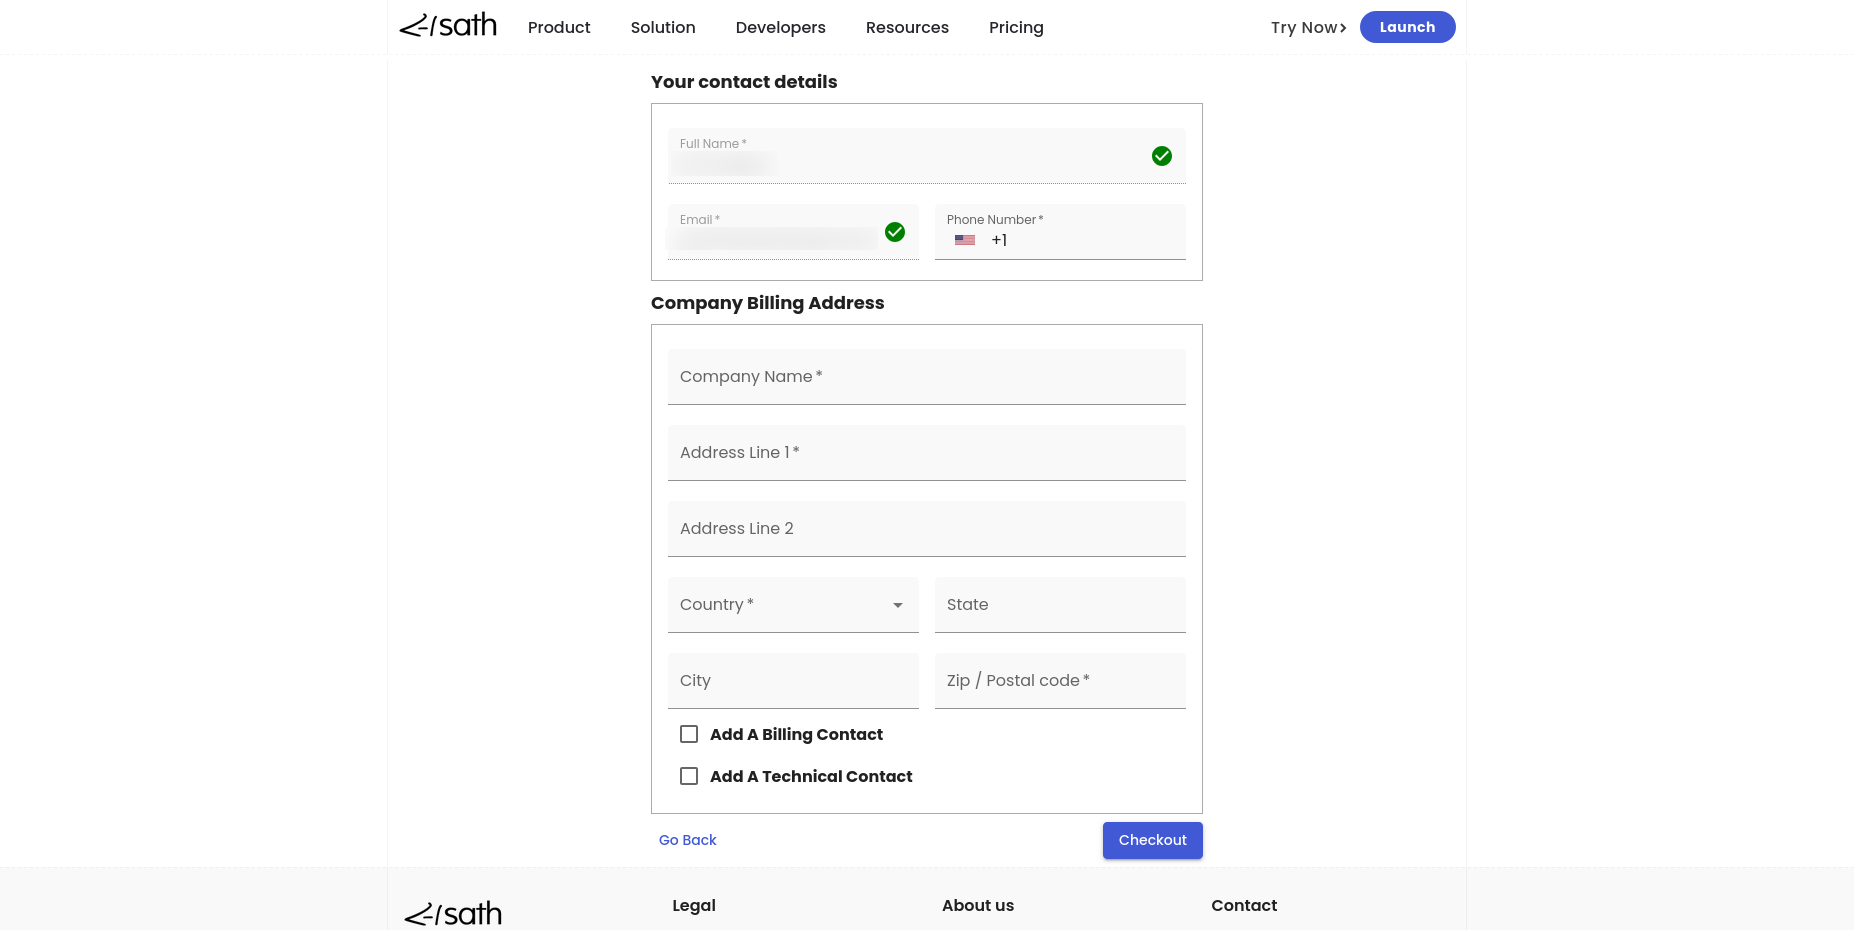
- If you are visiting this page for the 1st time, then you will have to enter the required information which are the following:
- Phone Number.
- Company Name.
- Address Line1.
- Address Line2.
- Country.
- Zip/Postal Code.
- Next time when you visit the page, the above information would be autofill in this page.
Order Confirmation Page

- Finally you will be shown the order confirmation page.
- Click on the
Account Managementlink which will redirect you to the account management page.
Account Management
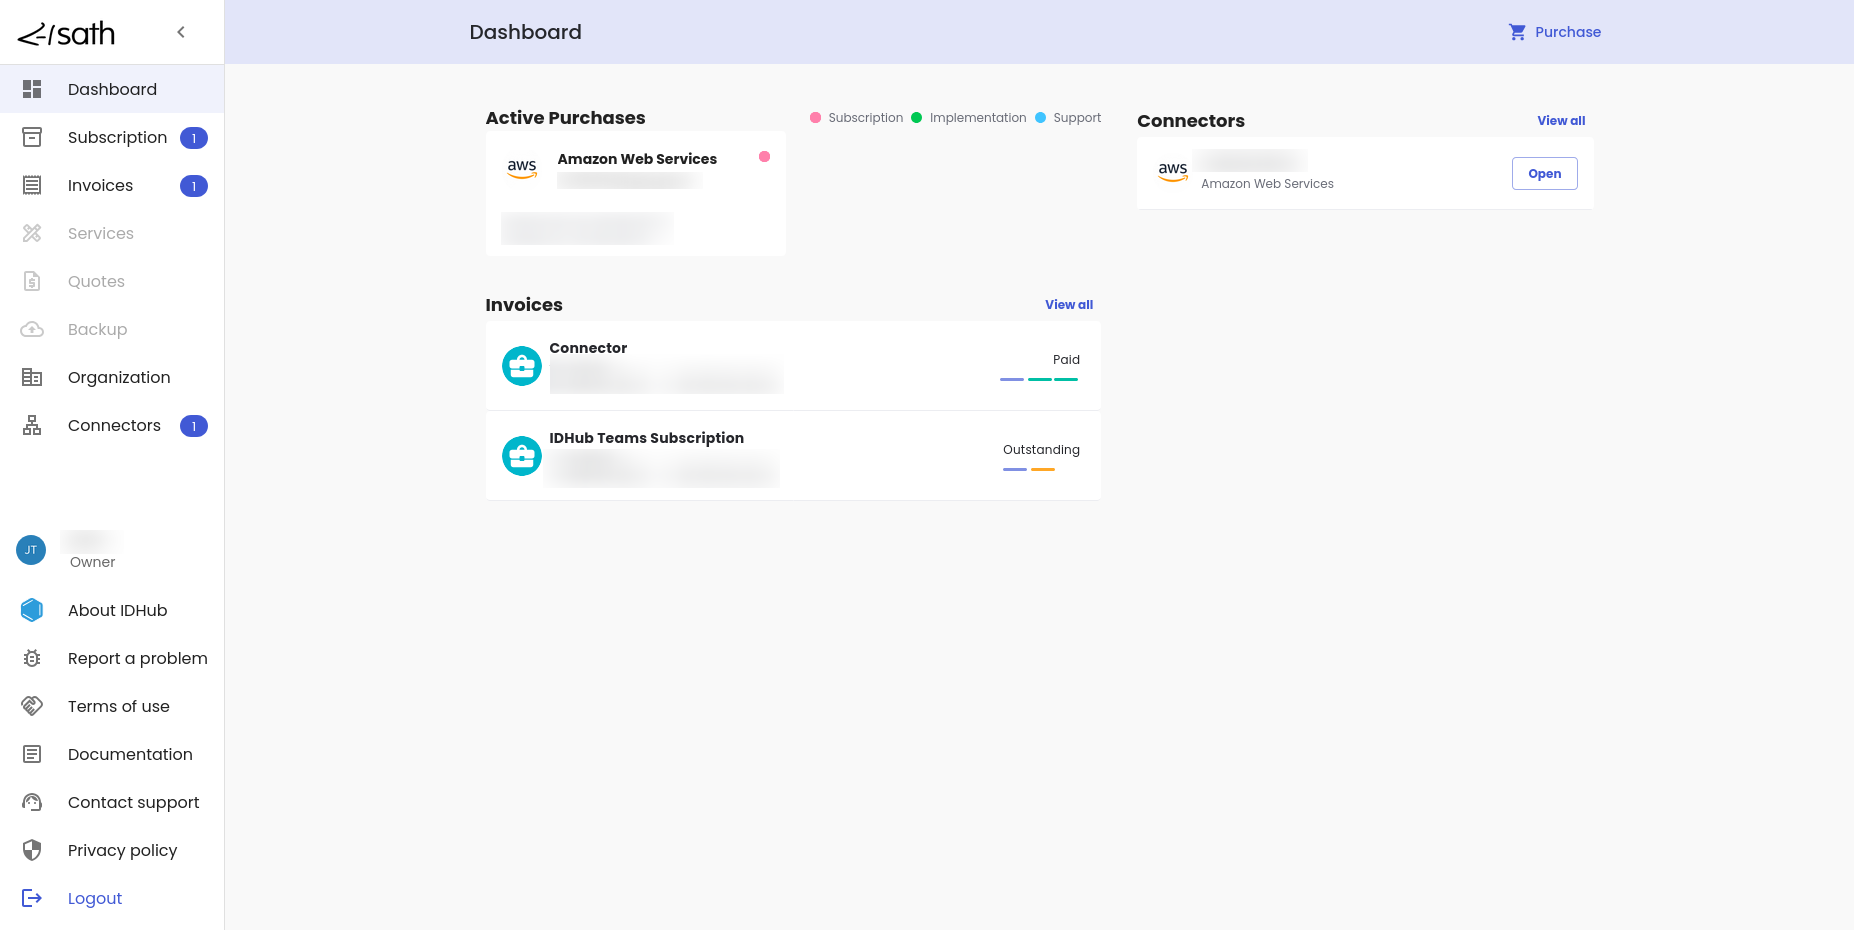
- This is your account management dashboard. From the left menu, click on the
Connectors. - The connectors page would show the complete list of all the connectors that you have deployed in your tenant along with it's health status.
info
- If you have not deployed any connector, the page would display
No Connectors Available. - You can click on the
Add Newbutton at the top to add new connectors. - You can click on the
Login to Tenantbutton to login to your IDHub Cloud Tenant.
Connector Manager
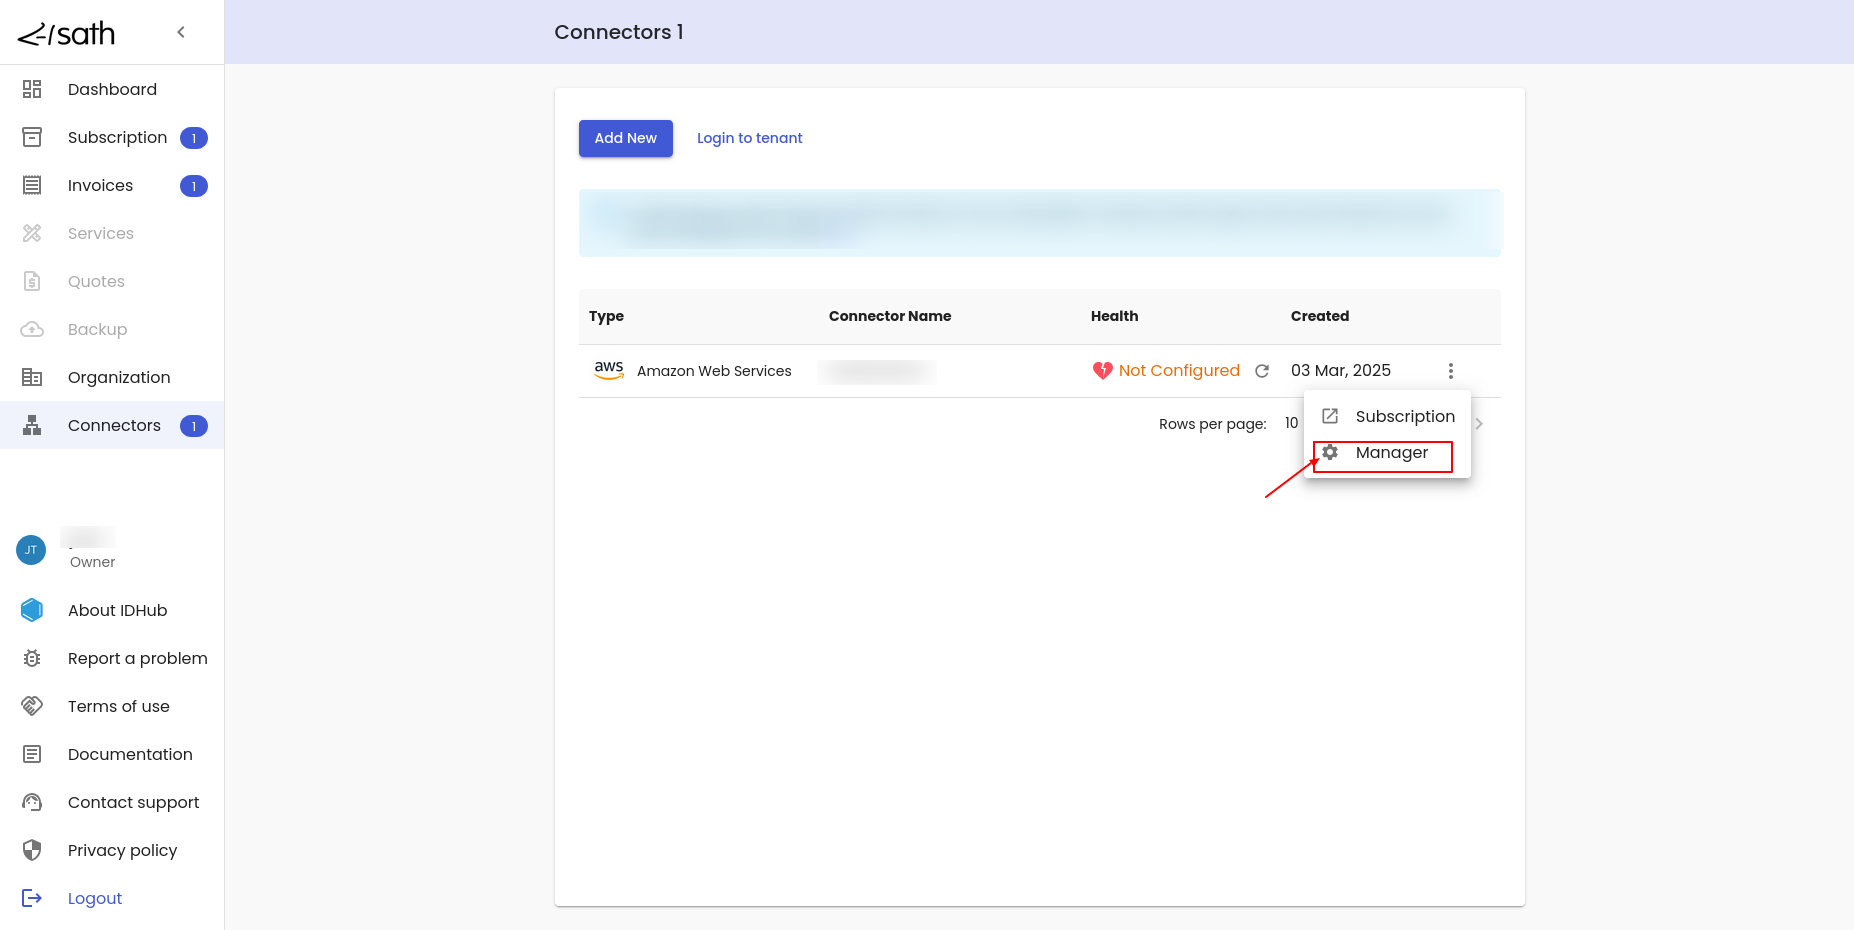
- Click on the 3 dots menu for the connector and then click on the
ManagerMenu. - You will be taken to the IDHub
Connector Managerpage. - Next, enter the application URL and the tenant name. The application URL is your
IDHub Application URLfor example:https://app.sath.com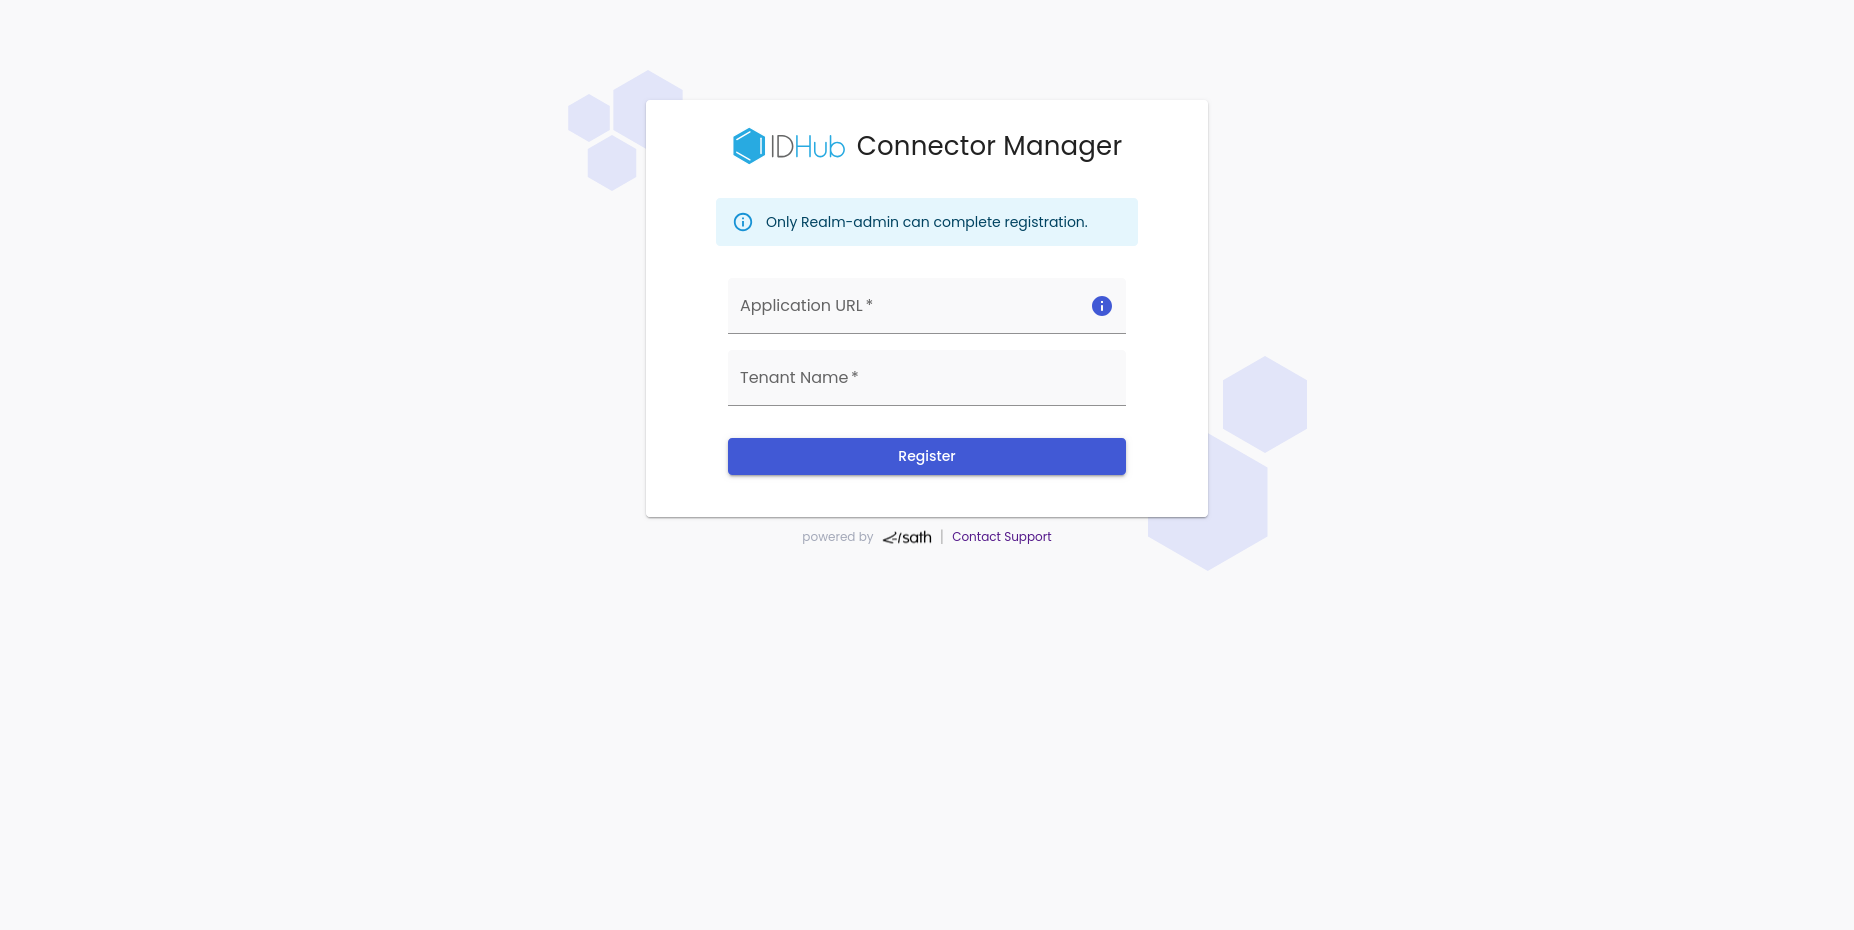
- Click on the
Registerbutton to proceed further.
Tenant Verification
In the next step, you will be redirected to your tenant login and would be asked to login to your tenant (if not already done so). Once the tenant login is verified you will be taken to the next page.
Connector Information Page
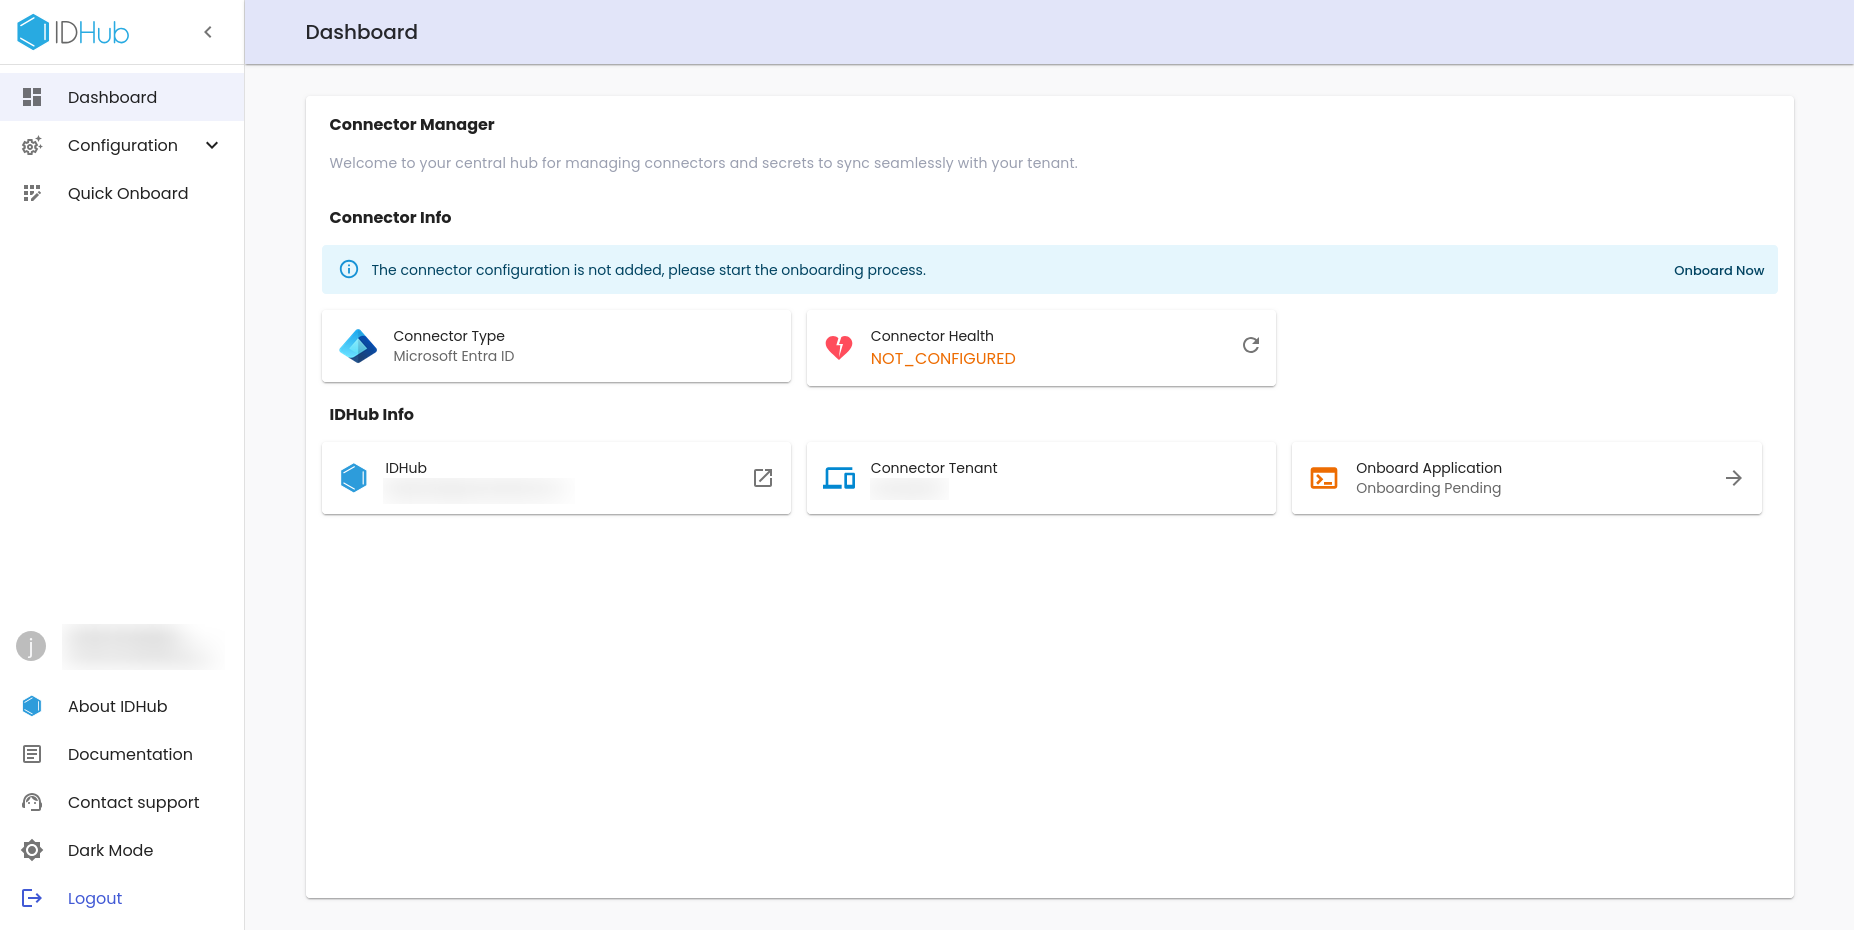 This page shows the following information:
- Connector type.
- Connector health.
- IDHub info:
- Application URL.
- Connector tenant.
- On-board Application.
- Click on the
Onboard nowlink to proceed further.
Application Credentials
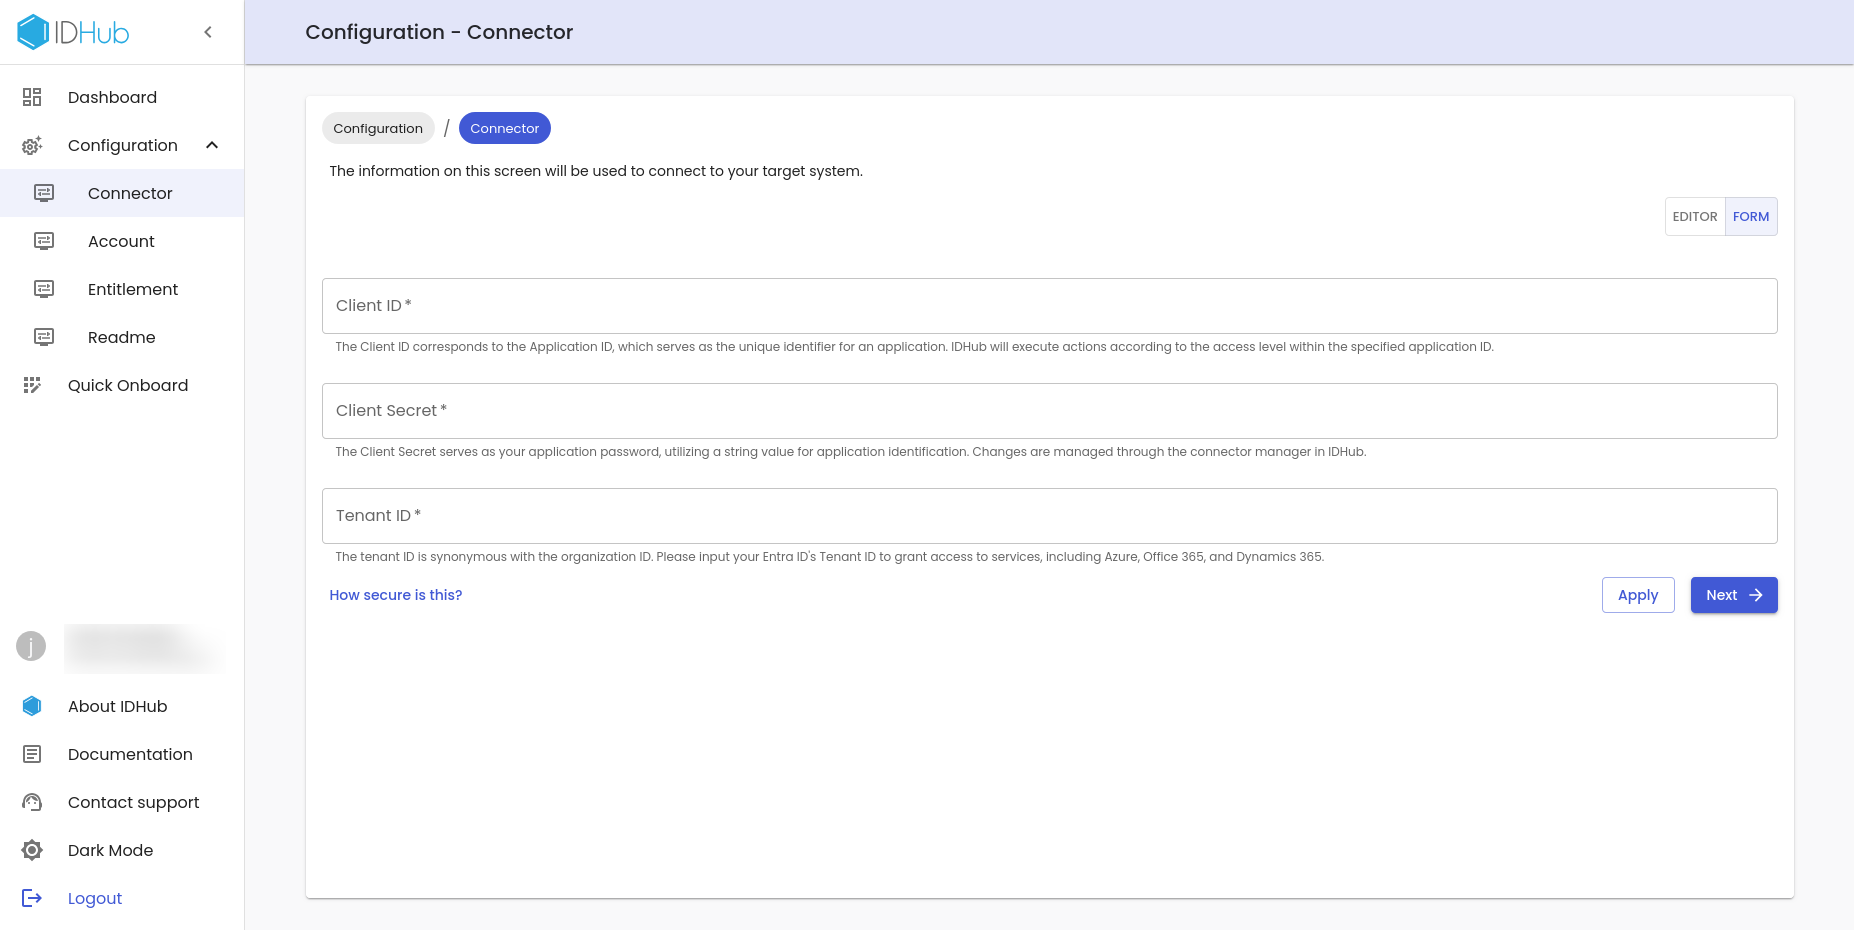
- Enter the credentials for your target system instance.
- Different connectors have different credentials and setups that you need to do at the target system, before you can On-board that connector in IDHub.
- After adding the required target system configuration details, click on the
ApplyandNextbutton to proceed further.
info
Refer to Connector Guide for detailed instructions on the Pre-Requisites for deploying the connector.
Account JSON
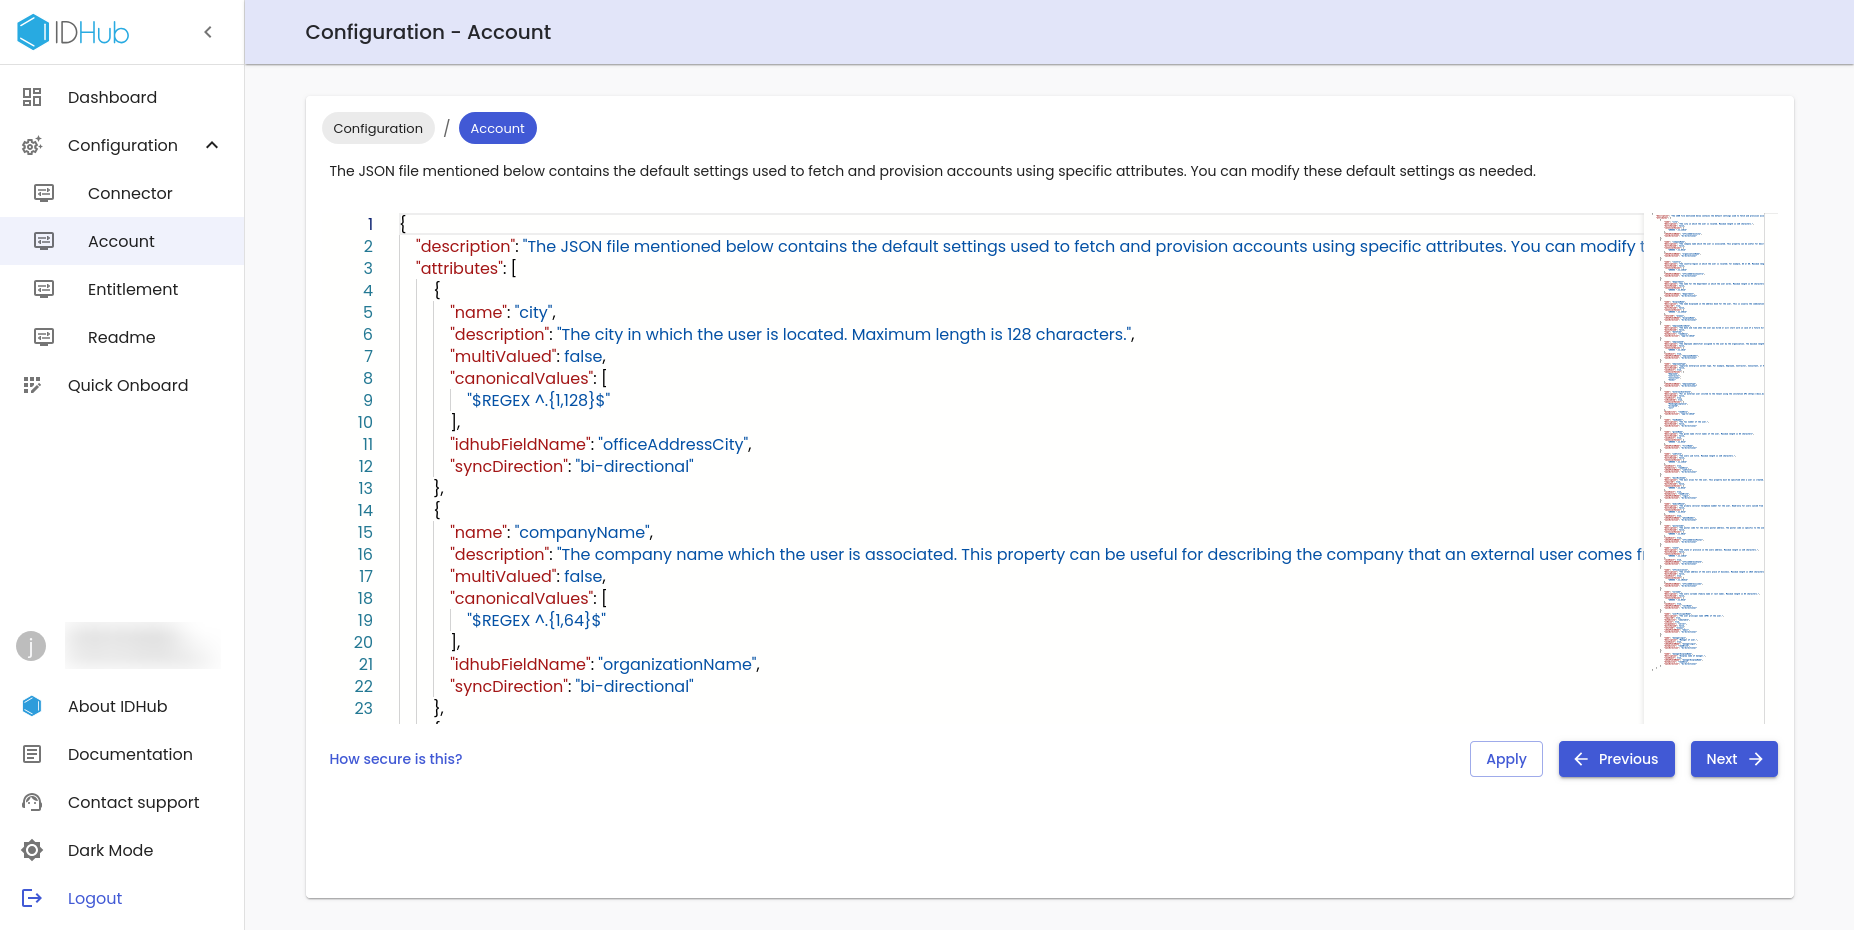
- Now you will be taken to the Account JSON page as is shown above.
- This page contains the default settings used to fetch and provision accounts using specific attributes.
- You can modify these default settings as needed.
- Click on the
ApplyandNextbutton to proceed further to the Entitlement JSON page.
Entitlement JSON
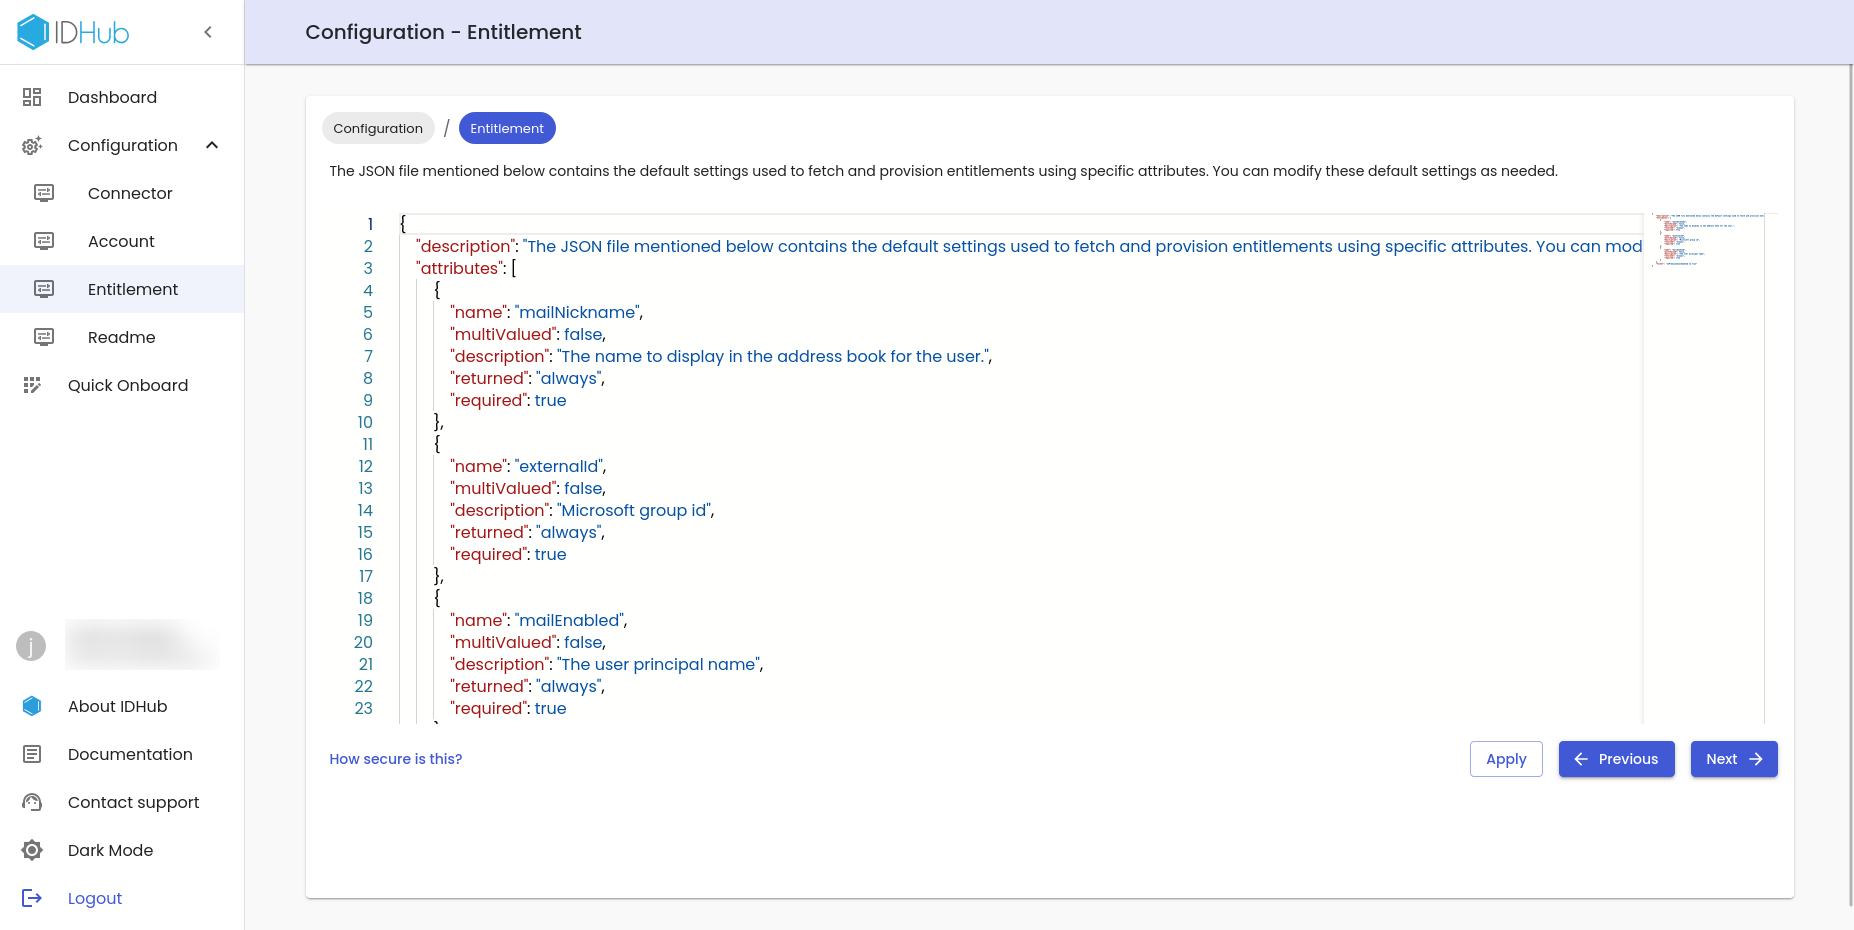
- This page contains the default settings used to fetch and provision entitlements using specific attributes.
- You can modify these default settings as needed.
- Click on the
ApplyandNextbutton to proceed further.
Scratchpad
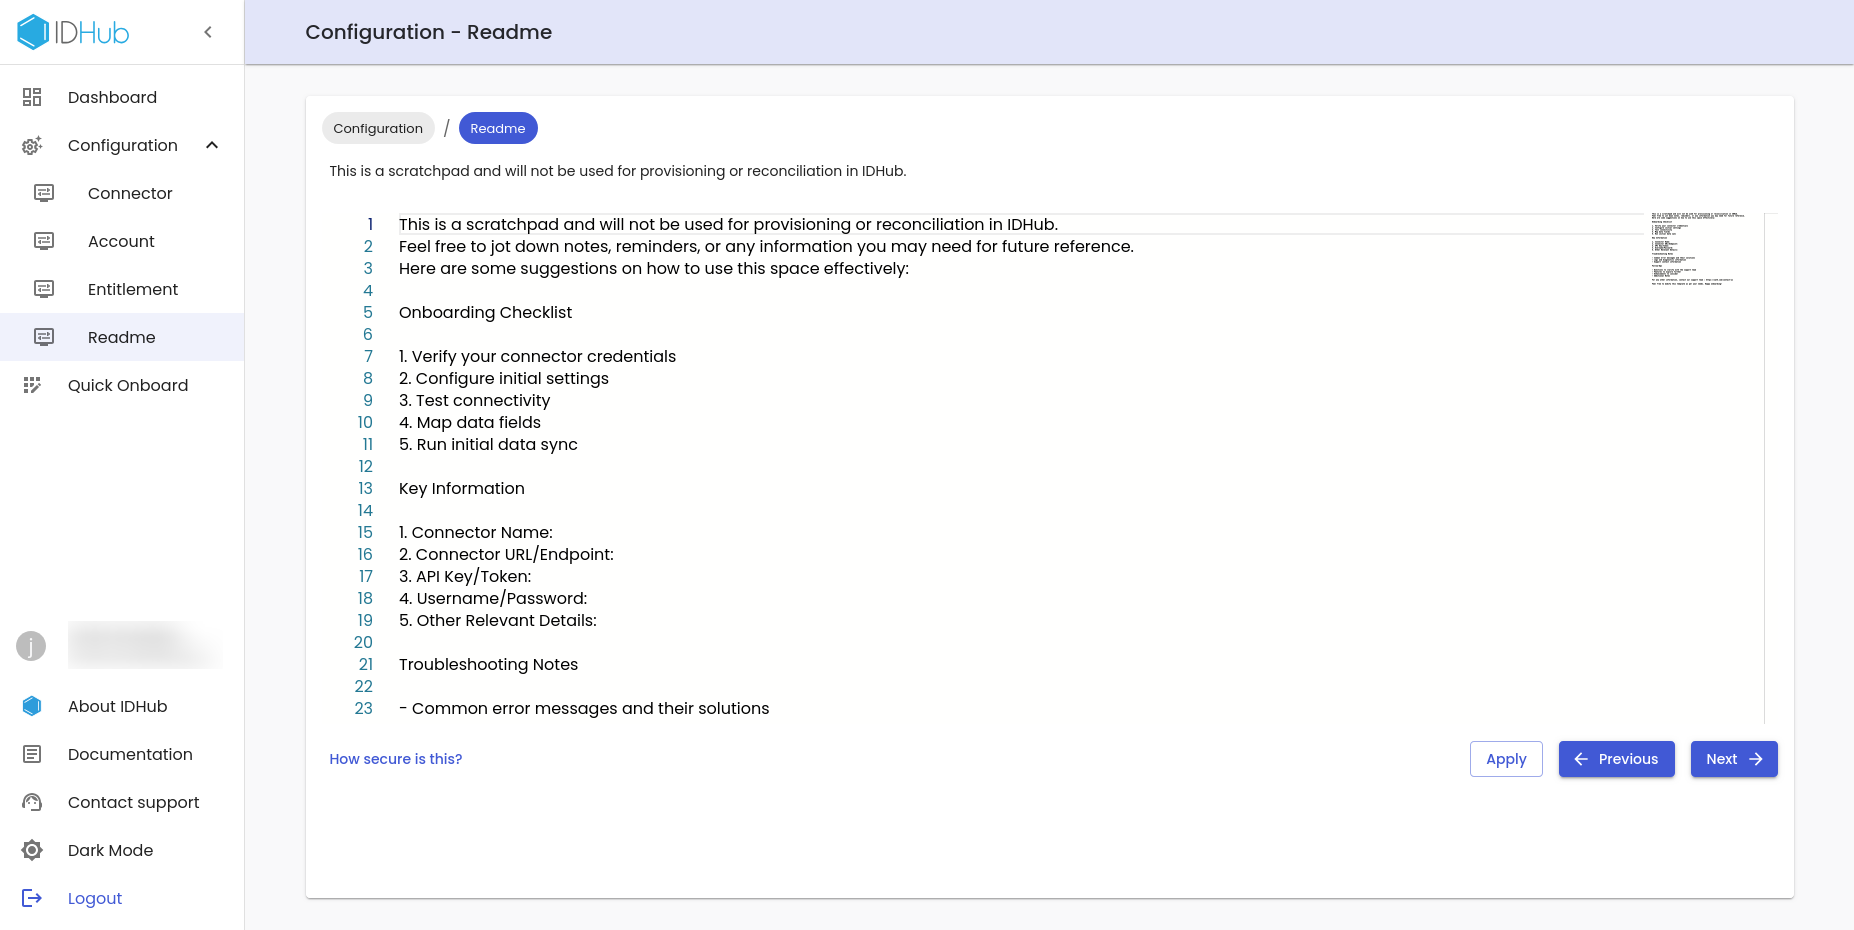
- This page functions as the scratch pad for the connector configuration.
- Here you can enter any notes, reminders, or any information you may need for future reference for the connector configuration.
- Information entered in this page, will not be used for provisioning or reconciliation in IDHub.
- Click on the
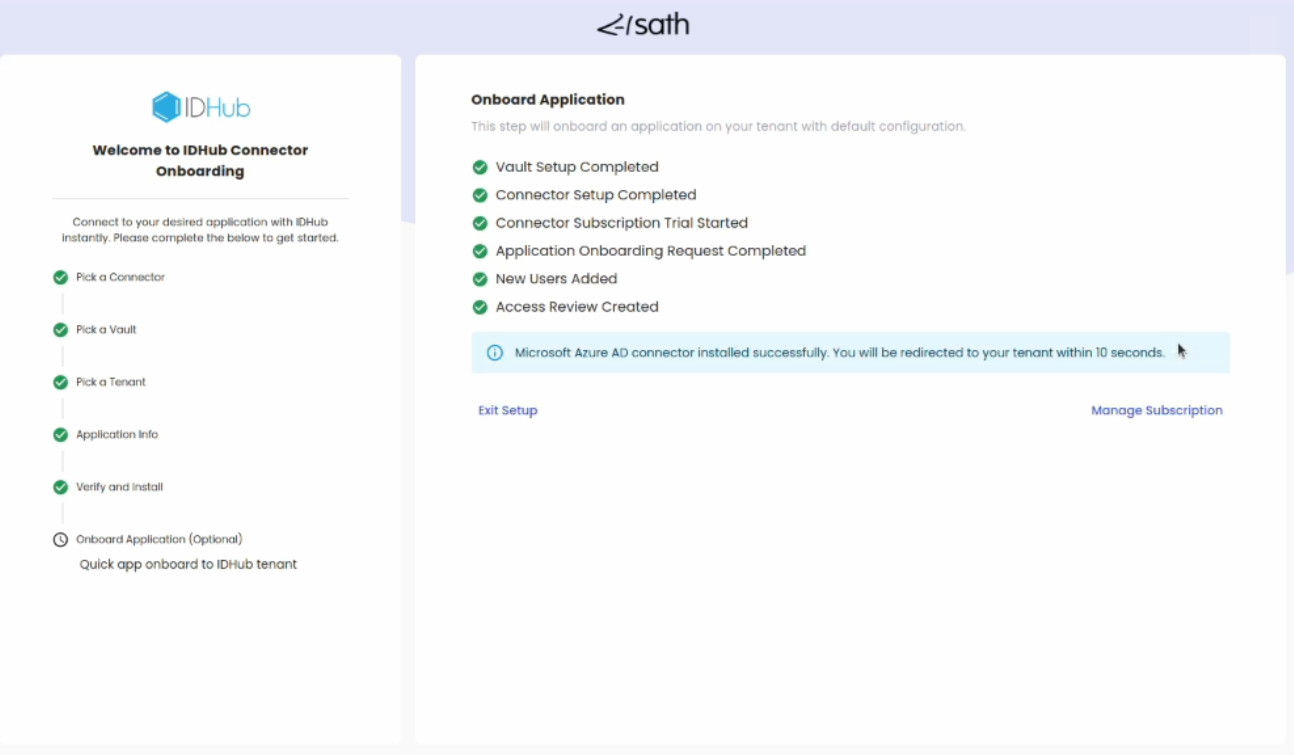
Nextbutton and then click on theOn-boardbutton. This will start the onboarding of the connector and once finished.
Application Name
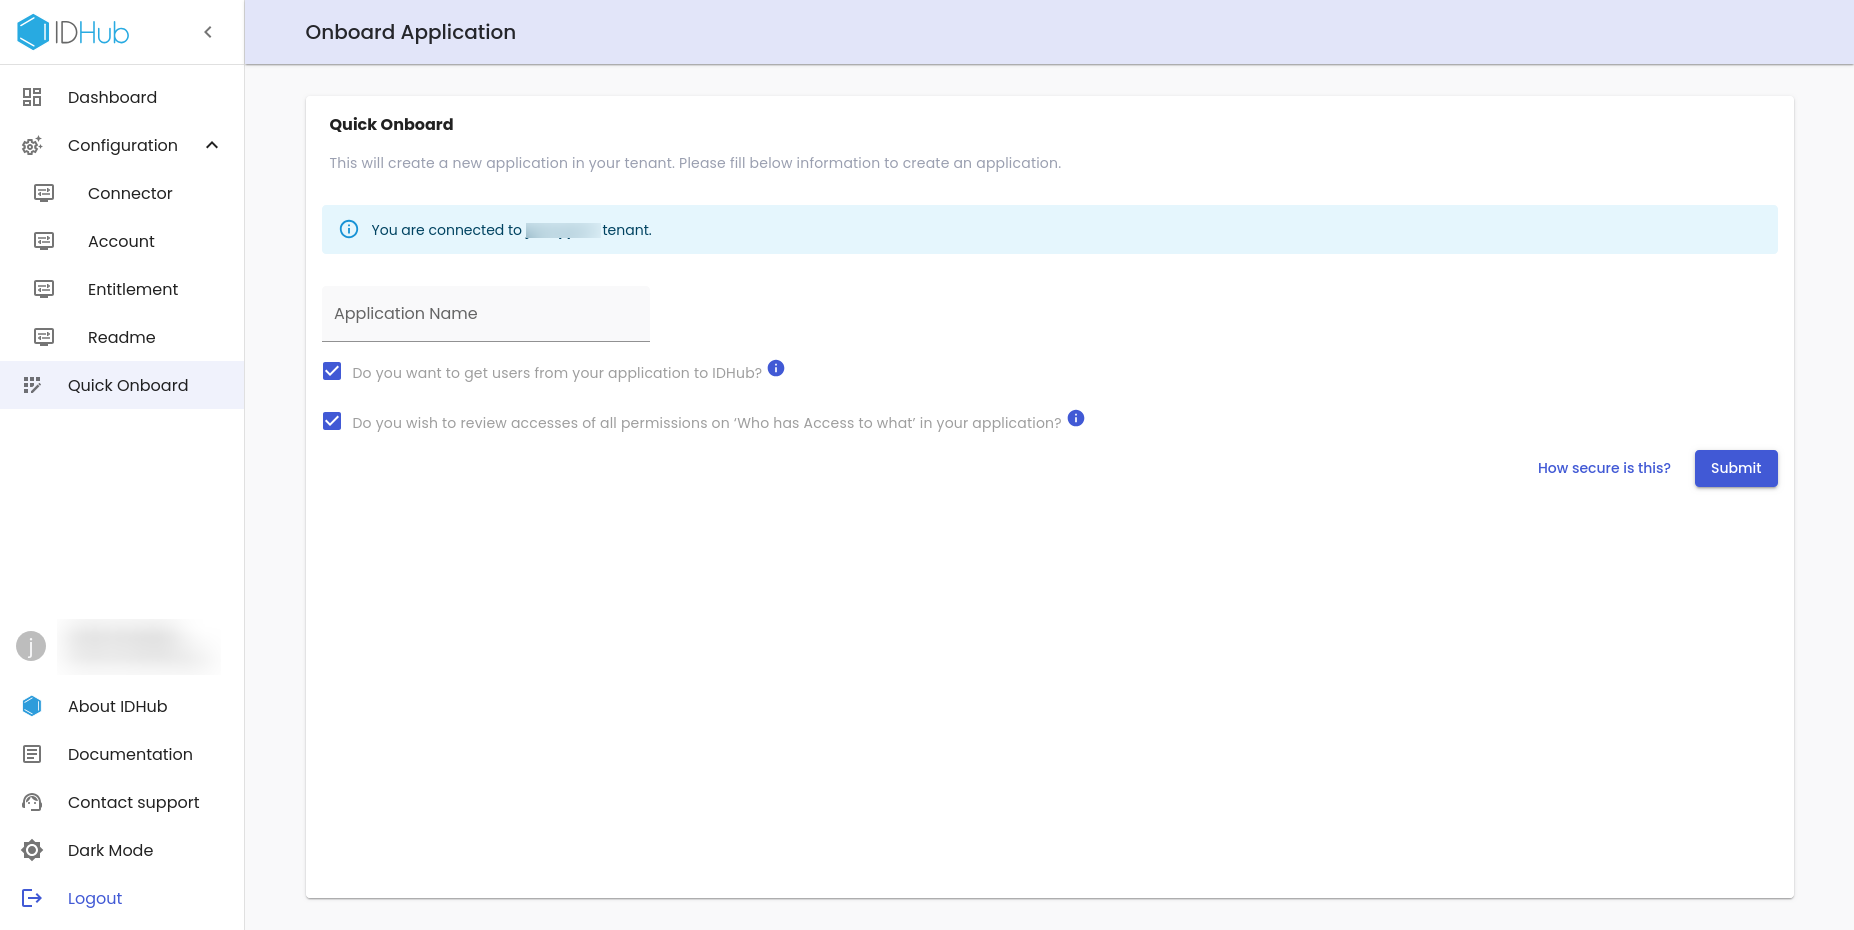 In this screen, enter the name of the application. There are two additional checkboxes that are as follows:
Do you want to get users from your application to IDHub?- If checked, then the target system is created as a Trusted App in IDHub. All users with unique email addresses in the target system instance would be added to IDHub.
Do you want to review accesses of all permissions on "Who has access to what" in your application?- This will create a certificate definition in your IDHub tenant. This you can later modify for performing access reviews on your target system accounts.
- This will create a certificate definition in your IDHub tenant. This you can later modify for performing access reviews on your target system accounts.
- Setup will take some time and display the confirmation message.
- At this stage, target system (connector) is successfully installed and target system application is also On-boarded to IDHub.
Verify the On-boarded Application
Log in to IDHub tenant and then click on the Manage Catalog. You will see the target system application.