Creating Workflow and Nodes
IDHub lets you create your custom workflow & nodes. This document would elaborate how you can create your custom workflow and custom nodes.
How to create a workflow
- Go to ‘
Workflow' in the Admin Module of IDHub using the credentials of a user that has the role of 'System Administrator'with them. - Upon landing in the workflow page click on the
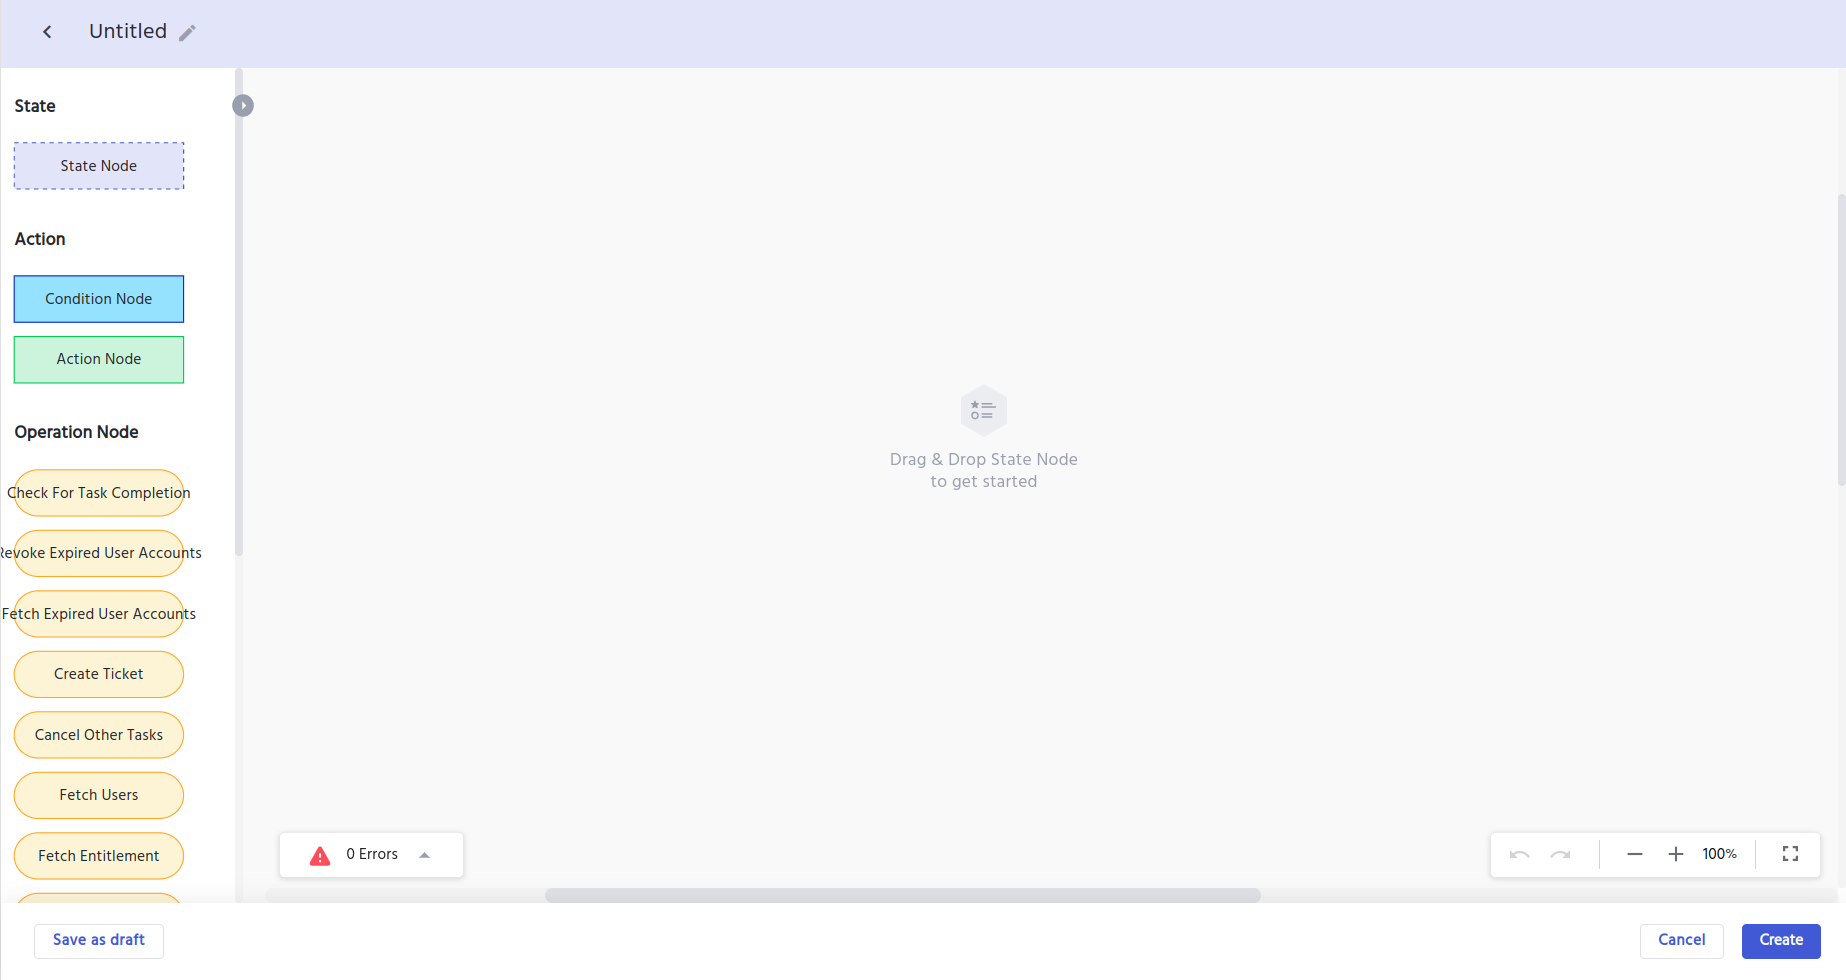
Create Workflowbutton. - Then you will be taken to the workflow canvas editor where you can create your own custom workflow.
Understanding the Workflow editor
- The left side section of the editor shows you all the nodes
- You can drag and drop the nodes in the editor to create the workflow
- At the top of the editor, you can click on the pencil icon to enter the name of the workflow

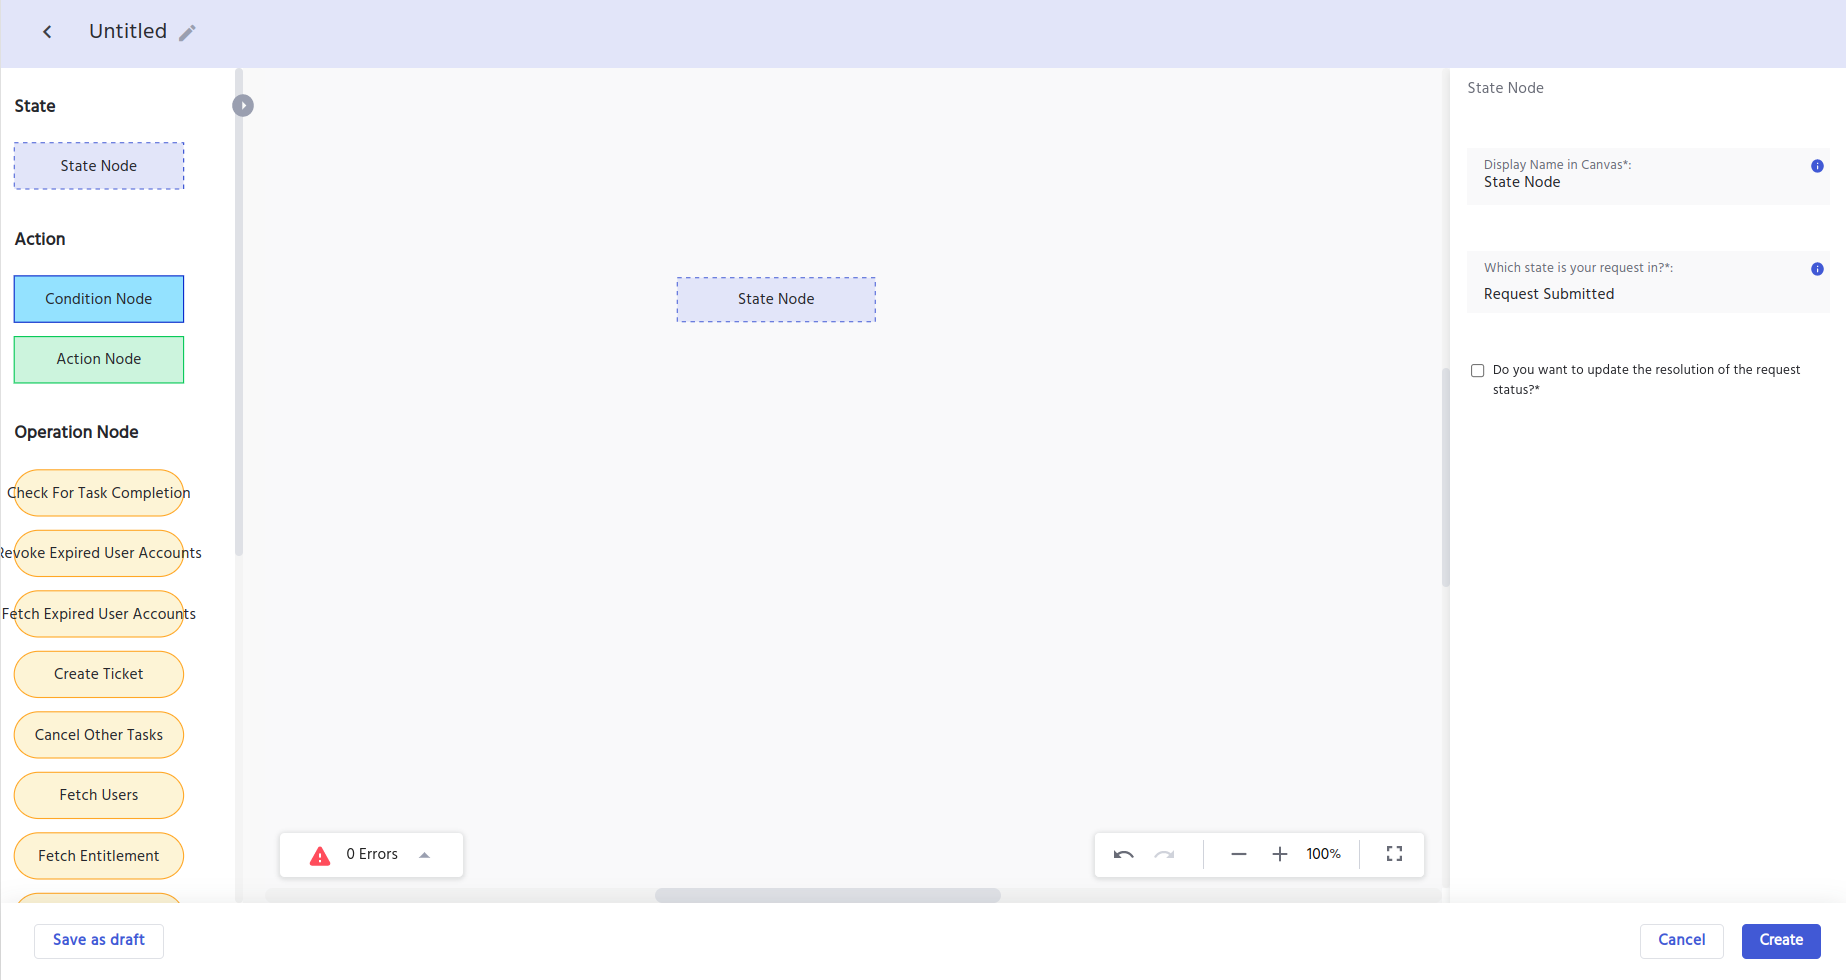
After you drag and drop one of the node in the editor, the node attributes will be shown in the right hand side. (See below)

You can edit the attributes of the nodes as per the workflow that you are creating and continue adding more nodes in the workflow.
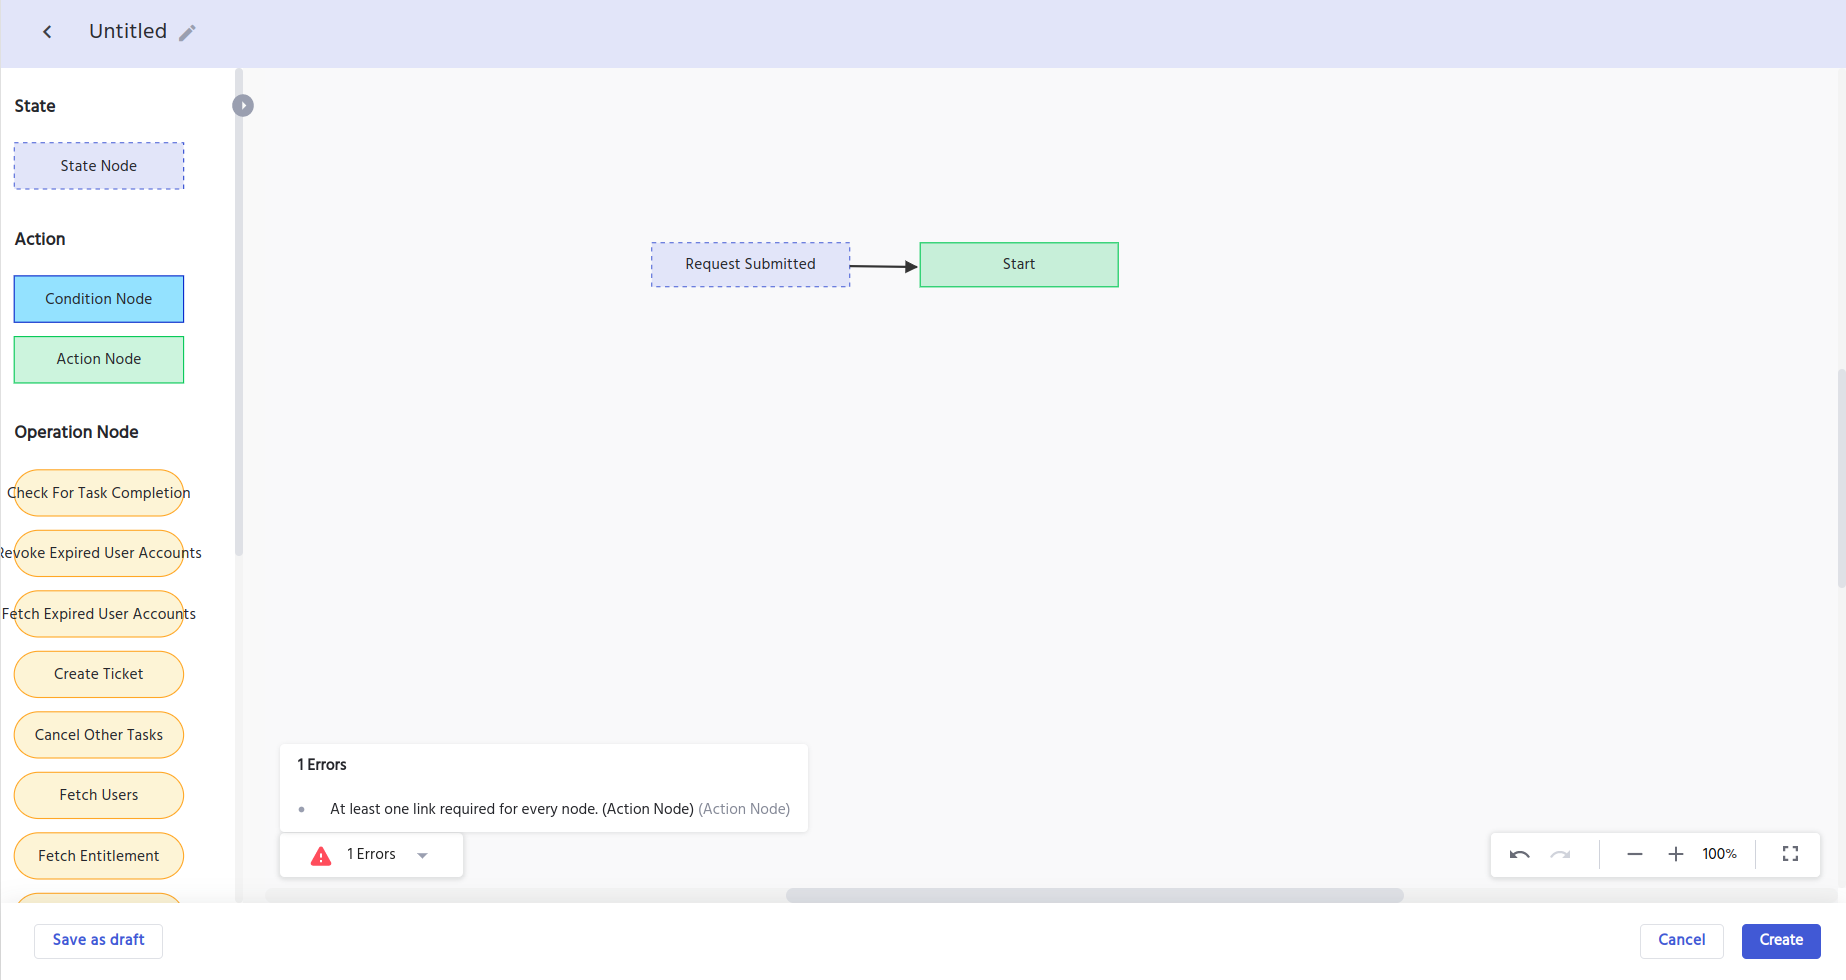
Clicking on any node will show the attributes of the node in the right hand side along with further actions that you can take on the node. (See below).
Let’s go into the details of the actions that you can take on each node in the editor
Remove- This lets you remove the node (object) from the editorClone and connect- This lets you clone and connect the node in one go.Clone- This lets you clone the node.Drag & Connect- This lets you connect the current node with another node with a line.

As you continue to build the workflow, errors in the workflow (if any) would show at the bottom left. Click on the errors button to see the list of errors and resolve it accordingly.
Once you have finished creating the workflow, Click on the create button to create your workflow.
If you are not finished creating the workflow and want to save the workflow as a draft, click on the “Save As Draft” button in the workflow editor. Later you continue editing the workflow from the workflow page.
How to create a custom node
- Go to ‘
Workflow' in the Admin Module of IDHub using the credentials of a user that has the role of 'System Administrator'with them. - Upon landing in the workflow page click on the
Nodetab. - Click on the
Add Nodebutton in the node page
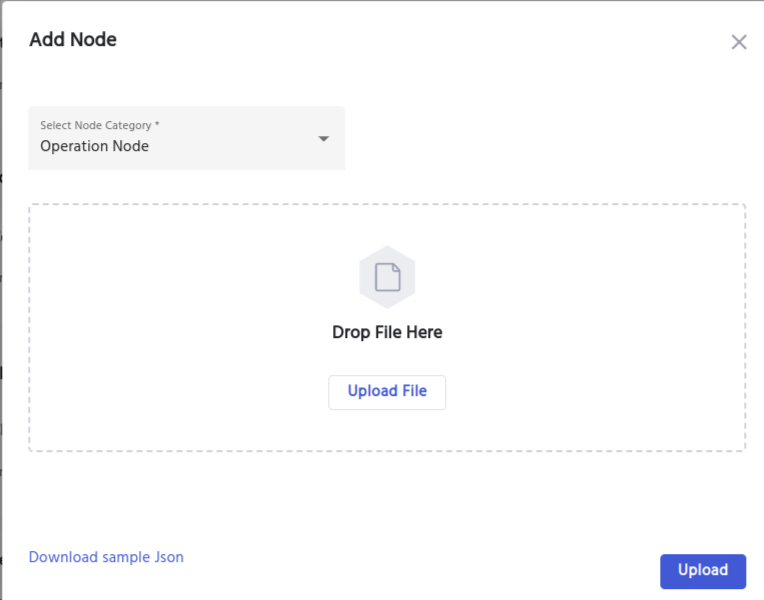
IDHub will show the Add node window (See below)

Understanding the Create Node Window
The Add node has the following elements which you need to enter/select to create your custom node.
Node category- Choose the category of the node that you are creating from here
Upload file- Here you can either upload or drag & drop the JSON file for the custom node
Click on the Upload button to add the node in IDHub. Once your node is added, the node will start showing in the workflow editor, which you can use to create your workflow.
- Currently IDHub supports adding custom operation node. In future, IDHub would support adding custom state and action nodes as well.
- You can click on the link “Download Sample JSON” to get an idea about the JSON that you will require in creating the node.