Enable User Feature
What is the Enable User Feature?
This feature of IDHub allows customers to enable users in their tenant. Enabling a user means changing their status from ‘disabled’ to ‘active’. Refer to the table below for details on the effects of an enabled user across various sections of IDHub.
| Category | Effect of Enabling a User |
|---|---|
| Active Requests | Active requests will now be shown for the enabled user. |
| Cart Request | An enabled user can be added as a beneficiary to cart items. |
| Proxy Users | An enabled user can now be added as a proxy and will also start showing in the "My Proxies" section of other users. |
| Certification | An enabled user will be visible in the certificate definition. Certify or revocation actions for the user in the certificate task will be processed as usual, per the workflow of the resource. |
| Tasks | Individual open tasks will now be assigned to the enabled user. Group open tasks can now be claimed by the enabled user. |
| Account | Once a user is enabled, IDHub changes the account status for connected applications. This feature depends on the target system; if it allows status changes, IDHub will update the account status. In the case of a disconnected application, if there is a status field in the onboarding form, IDHub will update that field when the user is enabled. |
| Roles | Active roles for the enabled user remain unchanged. |
| Direct Report & Owner | The new manager will receive the updates and tasks for the enabled user. The owner of the enabled user will be updated with the new owner. |
| Saved Lists | The saved lists will now start showing the enabled user as a beneficiary for any items added to the cart. |
How to Enable a User?
Enable User via Service Request
- Log in to your IDHub tenant.
- Go to the IDHub User App.
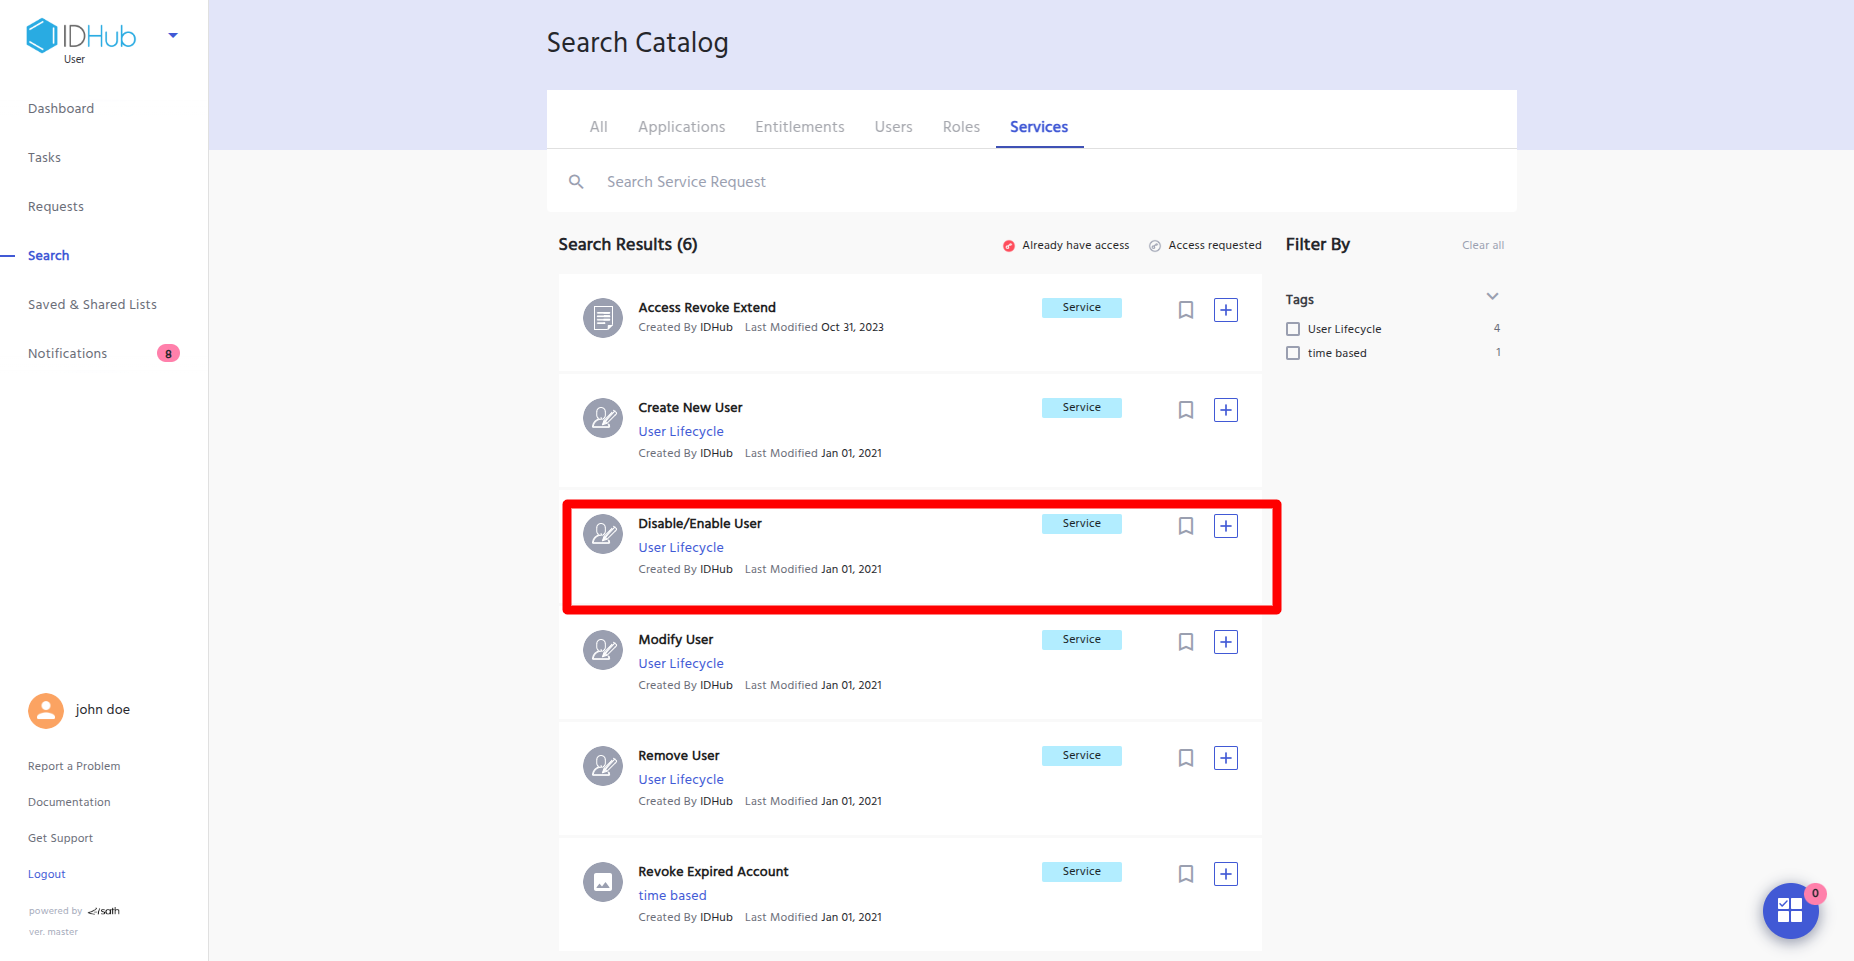
- Click on “Search”.
- Click on the “Services” tab.
- Add the “Disable/Enable User” service request to the cart.
- Click the “Proceed” button at the bottom.
- On the cart request page, add the user you want to enable.

- Click the “Continue” button at the bottom.
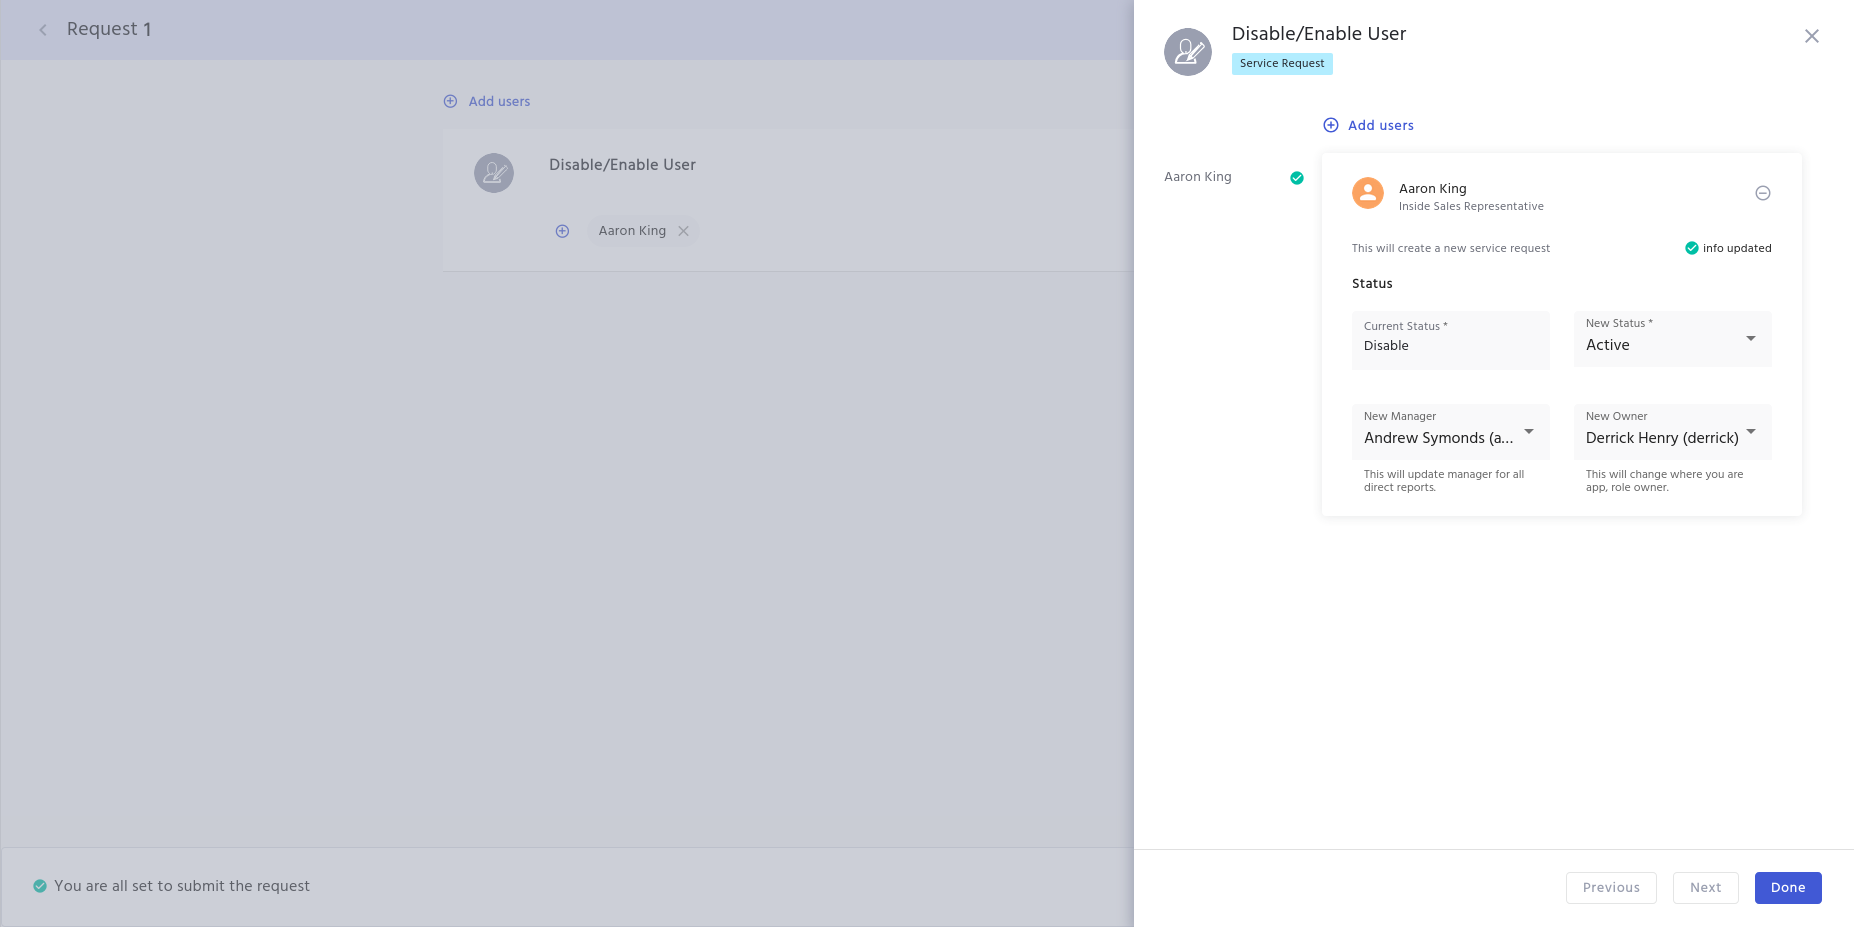
- On the next page, a panel will appear on the right-hand side showing the user's current and new status.
- In this scenario, the current status is “Disabled,” and you must select “Active” as the new status.
- Next, you will have to choose the new manager for the user, which will update the manager for all direct reports for the enabled user.
- You will also have to select the new owner, which will change the ownership of the application/role for the enabled user.
- After entering the above information, click the “Done” button, and then click the “Continue” button at the bottom.
- Enter your justification for the request.
- Click the “Submit” button to submit the request.
- The request will go to the access manager.
- Once the access manager claims and approves the request, the user will be enabled.
Enable User via KeyCloak
- Log in to your IDHub tenant.
- Go to the IDHub Admin App.
- Click on “Admin Settings”.
- Click on “SignOn”.
- Click the “KeyCloak Administration” button.
- You will be taken to the KeyCloak Administration section.
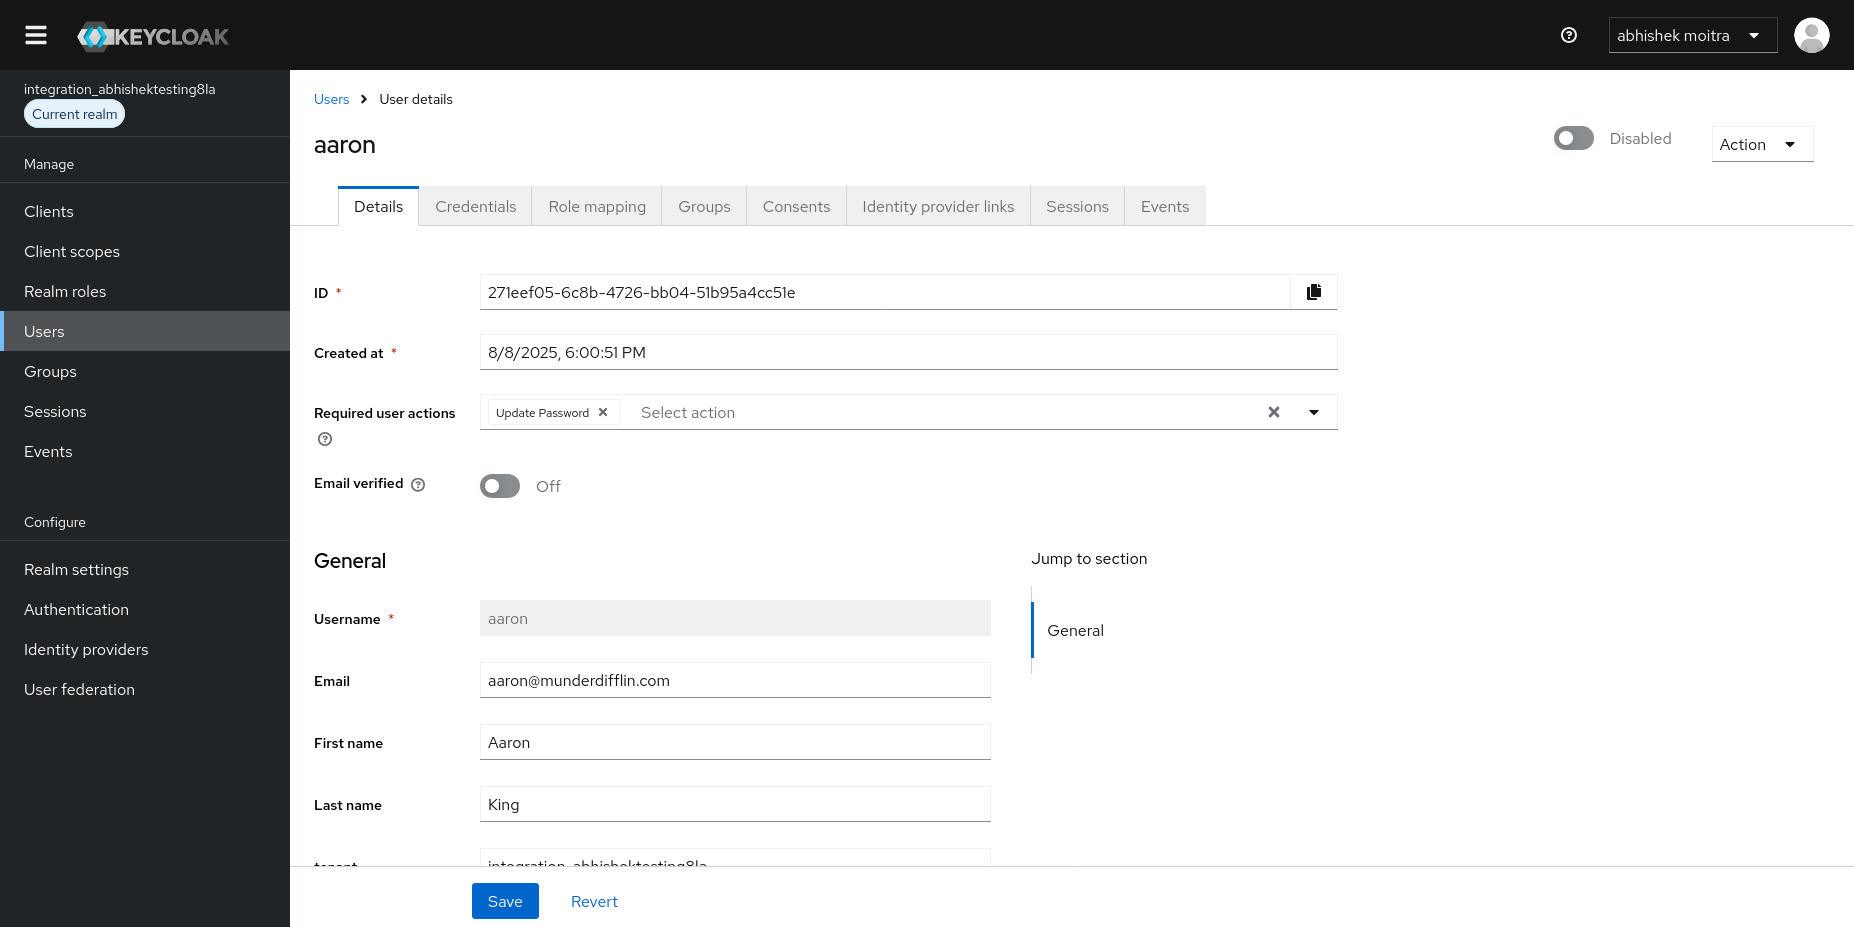
- Click on “Users”.
- Click the "Enabled" toggle to “On”.
- Click the “Save” button at the bottom of the page to complete the action.
How to Verify if a User is Enabled?
Via Search Catalog
- Log in to your IDHub tenant.
- Go to the IDHub User App.
- Click on “Search”.
- Click on the “Users” tab.
- The enabled user will be shown in the search catalog.
Via Tenant Login
- The enabled user will be able to log in to their IDHub tenant using their credentials.
Common Use Cases
Scenario #1: Employee Returning from Extended Leave
James, a senior product manager, went on extended leave. As per the organization's policy, the IDHub admin disables James's user account, which ensures that his account status is disabled for applications and that tasks assigned to him are reassigned to his manager. When James returns to the office, the IDHub admin enables his account, which ensures the following:
- The account status for all connected applications is changed to ‘active’.
- James will now be assigned any tasks as per the access request workflow of applicable resources.
- The new manager of James will now receive tasks and updates.
- James is immediately visible in certification definitions again.
- In any ongoing access certification tasks, his access can now be reviewed and certified as usual, ensuring compliance is maintained without delay.
Benefit: In this scenario, the IDHub Enable User feature ensures a secure and easy restoration of the user account, removing manual IT effort and access delays. This ensures that the employee is completely productive from day one of their return to the office, with all accounts, permissions, and workflows functioning correctly.
Scenario #2: Contractor-to-Employee Conversion
David is a temporary employee, and when his contract term is completed, the IDHub admin disables his account. However, due to his exceptional work, the company decides to re-hire David as a permanent employee. In this case, instead of creating a new user account, the IDHub admin enables David's existing account, which ensures the following:
- Enabling the existing account is more efficient and avoids creating identity sprawl. It ensures that David is able to access all his previously provisioned applications.
- The roles that were assigned to David remain unchanged, so he will have the same level of access as before.
- David can now be added as a proxy for another user and as a beneficiary for new access requests.
- For a disconnected application, IDHub updates the "status" field from "Disabled" to "Active," signaling the fulfiller to manually grant access.
Benefit: In this scenario, the IDHub Enable User feature simplifies the process of re-hiring contractors. This helps maintain consistent identity records and ensures that the correct roles and permissions are assigned, allowing them to start working immediately.
Scenario #3: Reinstating Access After a Security Event
John, a senior financial analyst, is traveling for work. Due to internal policy violations, the organization temporarily disables his account and access rights. The IDHub admin disables his account to prevent any internal threats or security breaches. After John provides a proper explanation to management, the organization decides to reinstate his access. The IDHub admin enables John’s account to restore his access, which ensures the following:
- John can now access all his previously provisioned connected applications, restoring his access to critical financial applications.
- John is now assigned time-sensitive approval tasks for any access request workflows in applicable resources.
- For the Saved Lists feature, John can be added and shown as a beneficiary, normalizing the request process for teams that use this feature frequently.
Benefit: In this scenario, the IDHub Enable User feature ensures the quick restoration of a user account after a security event has been detected and resolved. This approach avoids disruptions in business processes and access delays while maintaining a strong security posture.